Welcome to HydrostreamForums.com
If you're not registered, please consider doing so. It's easy - just click the "Register" link at the top
right corner of the page. Our forum needs members like you to contribute to the site in order to survive.
We are a community of boat lovers and Hydrostream enthusiasts here; we are happy to help anyone
who may need advice or guidance for their 'Stream; and we encourage members to offer their advice
and guidance to others as well. Thank you for visiting our forums, and please register.
We're better than Facebook.
Registering only takes a few minutes and you can do so by CLICKING HERE
If you are a member, don't forget to log in to take full advantage of the forum.
1980 Viper Rebirth
-
 AdamDK
- Moderator

- Posts: 327
- Joined: Jul 19, 2016 6:58 pm
- Location: Oshawa, Ontario (near Toronto)
- Has thanked: 45 times
- Been thanked: 73 times
Re: 1980 Viper Rebirth
Wow sorry. I guess i forgot to add more. The wife and I were living in her grandfather's house after he passed - it was sold so we were scrambling to find a new place to live (i.e. get approved for a mortgage and buy our own). I'll have to find my camera and get those pics loaded.
-
AdamDK
- Moderator
- Posts: 327
- Joined: Jul 19, 2016 6:58 pm
- Location: Oshawa, Ontario (near Toronto)
- Has thanked: 45 times
- Been thanked: 73 times
Re: 1980 Viper Rebirth
Alright, found my camera.
This work was done periodically between June 6th and roughly middle of July 2018. I was super busy with trying to find and buy a house, and packing up all my stuff.
---------------
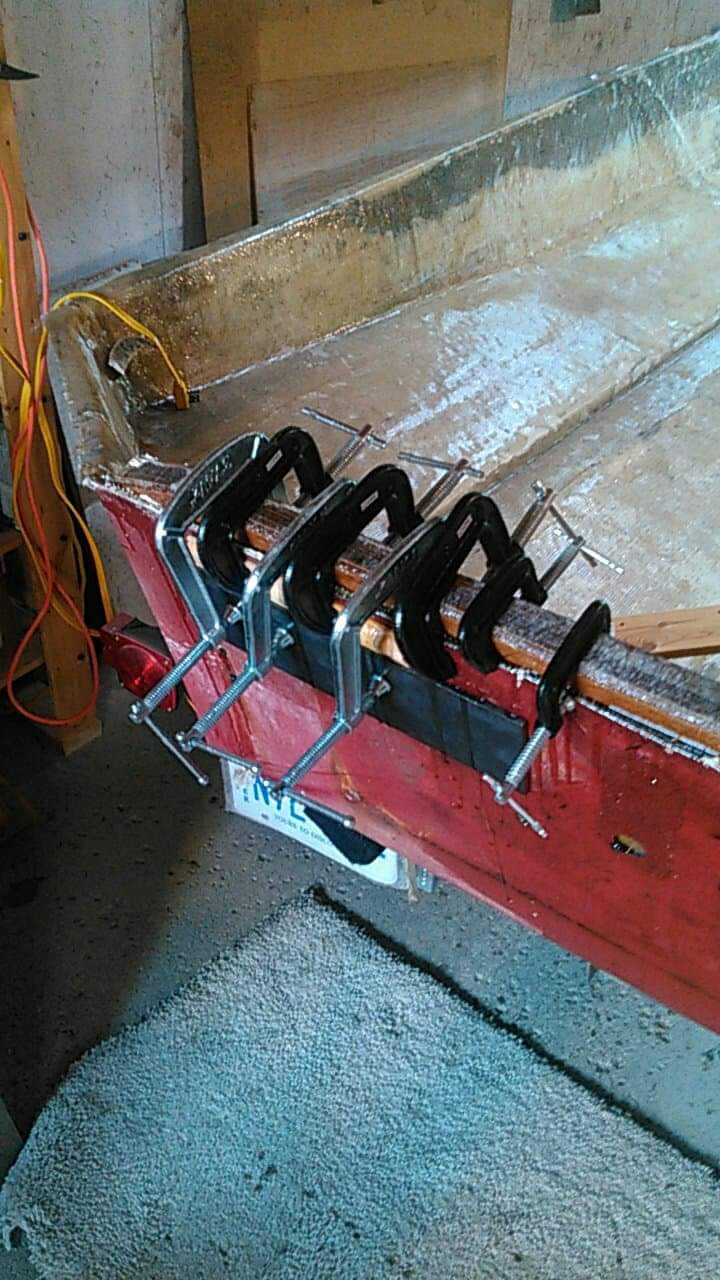
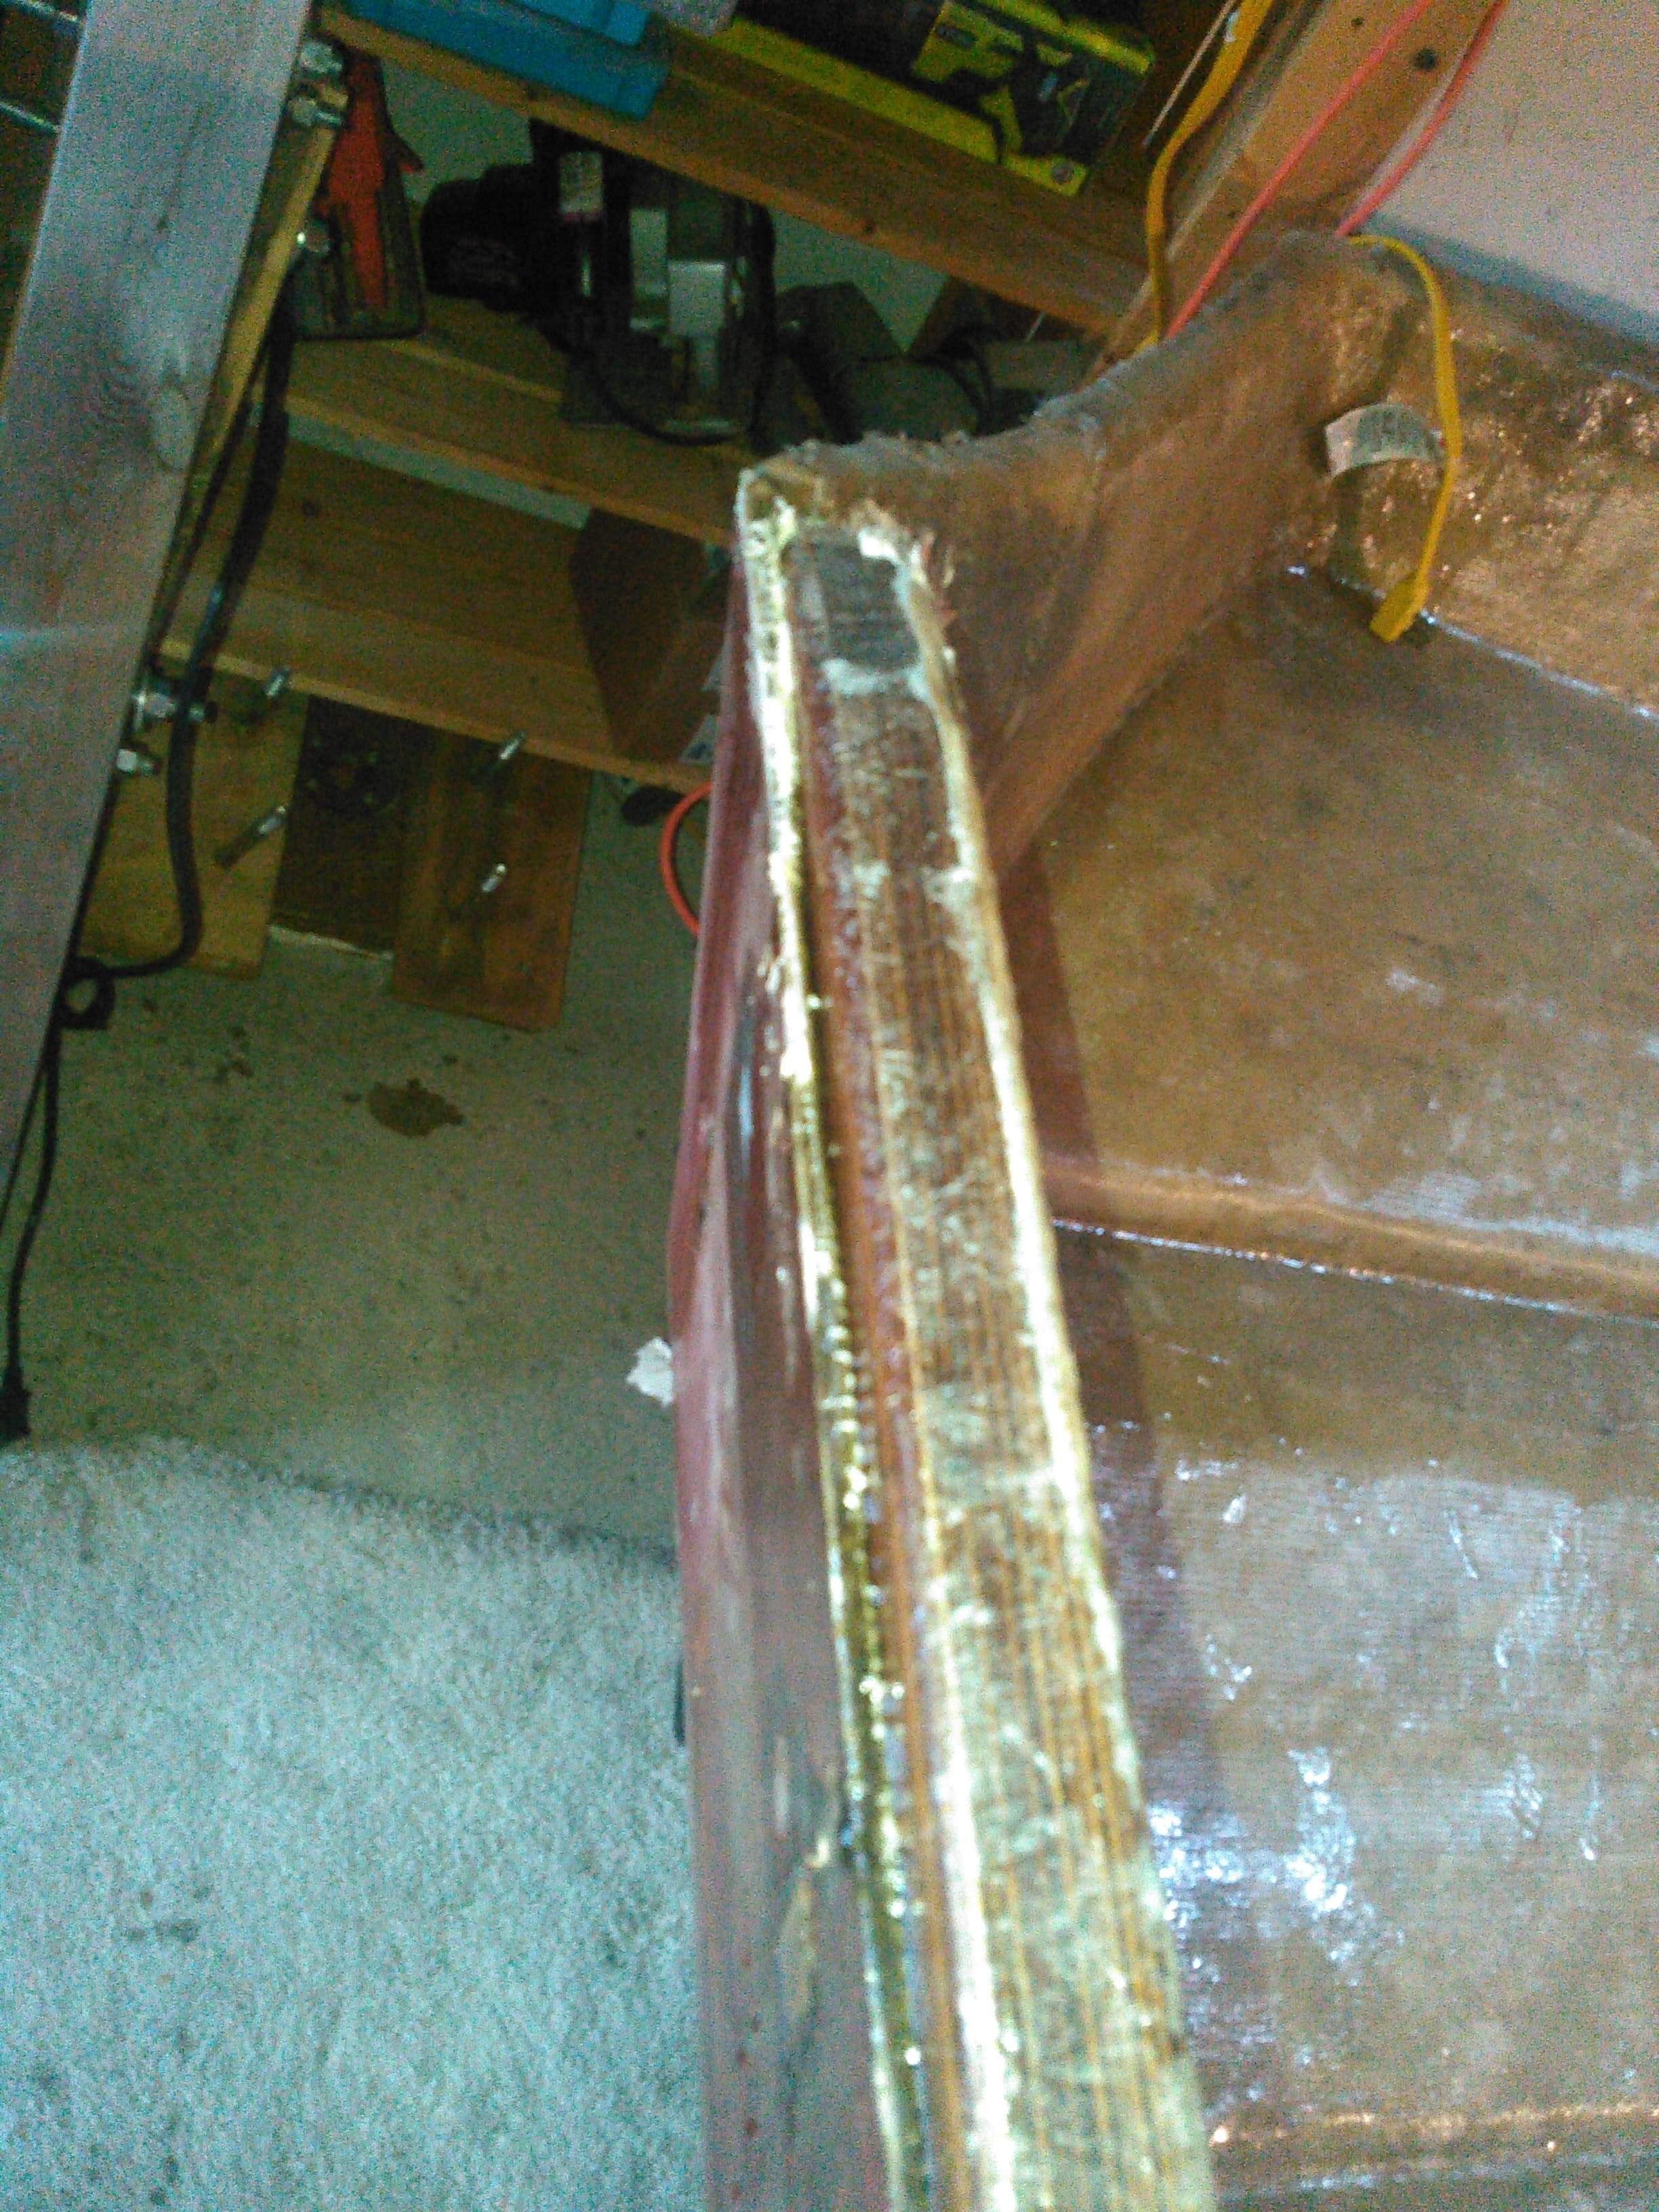
Dealing with the gap between the transom skin and the new transom, I ended up using a prybar to gently widen the gap a few millimeters to allow resin to get down a bit deeper, and then clamped the hell out of it.
---------------
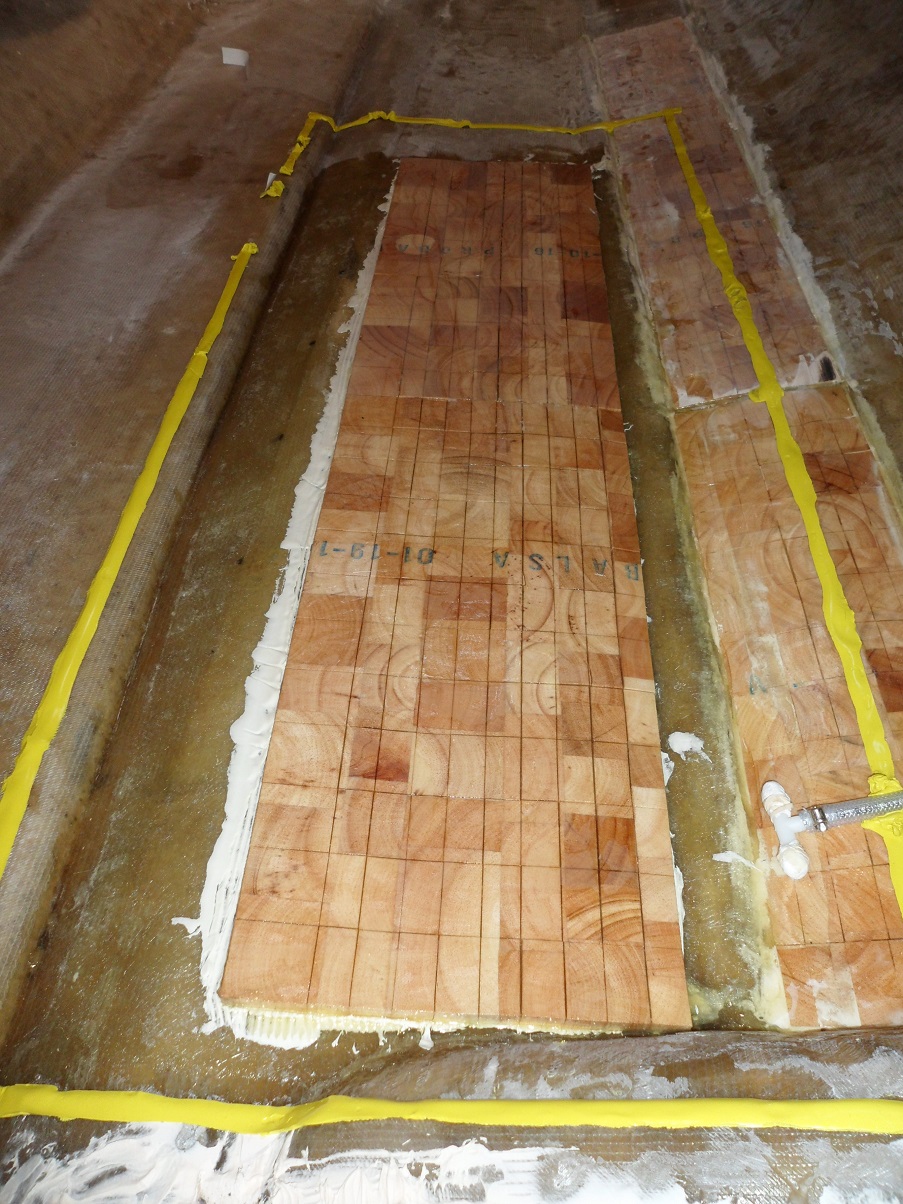
Now onto the (not so) fun stuff. Balsa core.
I should note that for this stage of my work, I'm using general purpose ortho polyester resin. I heard Vinylester doesn't play well with CoreBond under vacuum, so I went with poly.
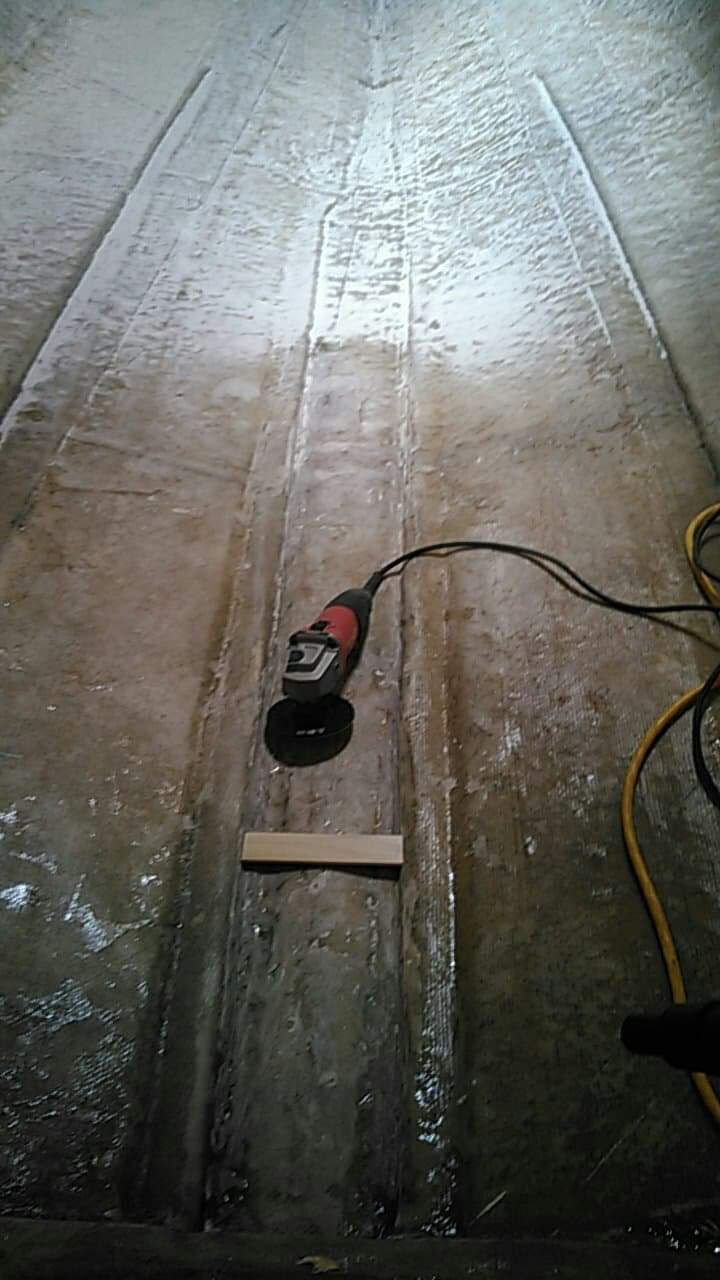
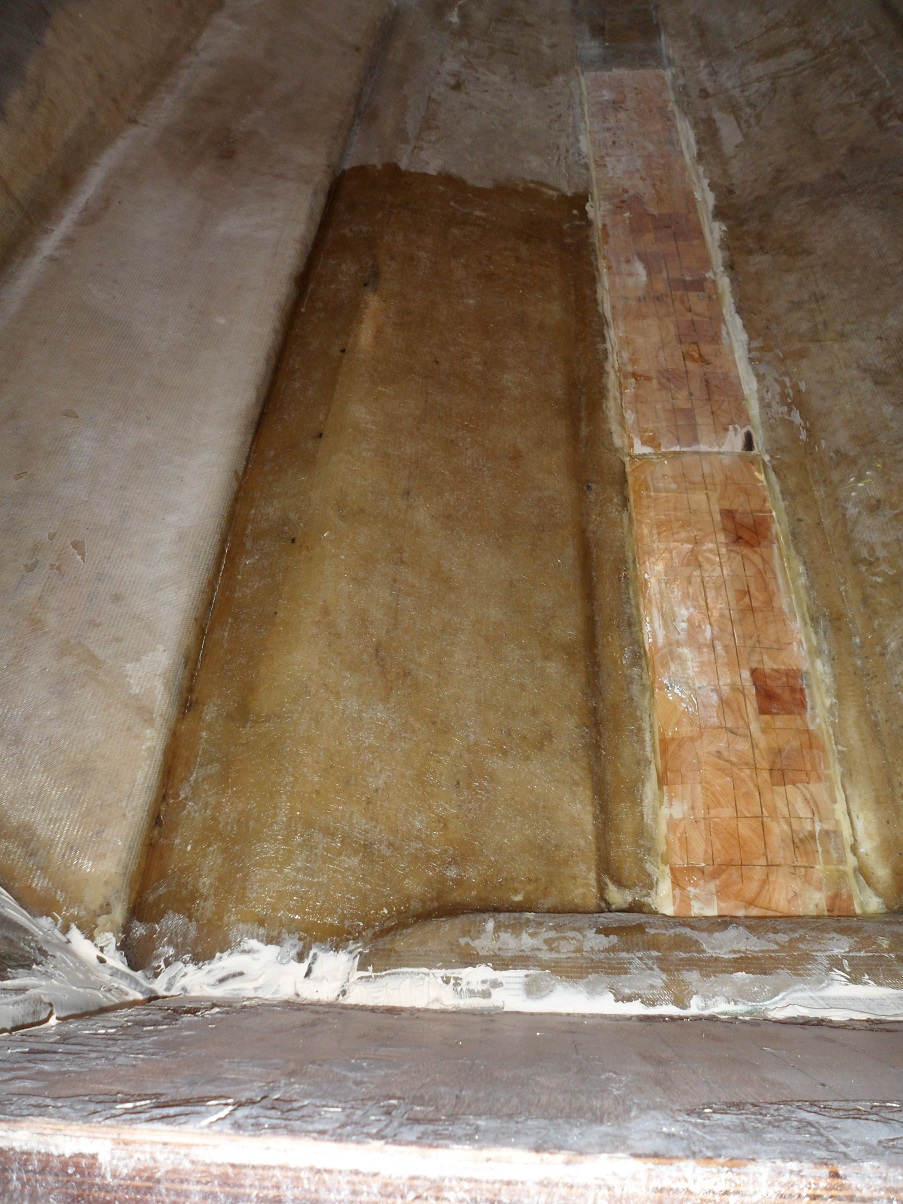
Unfortunately with the house bullsh*t, my new glass had long since cured. So I knew id have to re-grind. Just a light job to create a mechanical bond. I started in the pad, scuffing the main surface while straightening the edges to fit the core.
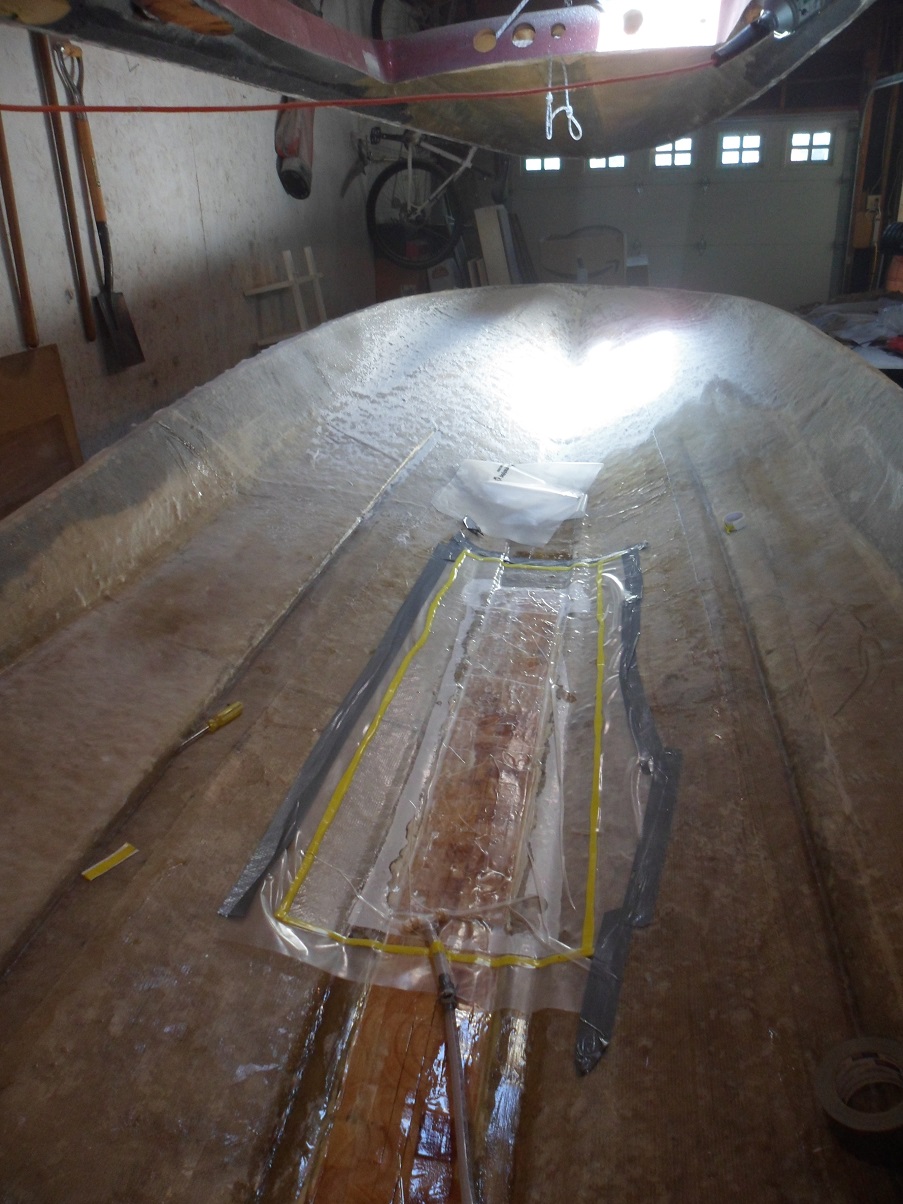
Next I laid down a layer of CSM, and let that tack up while I prepped the bagging stuff, CoreBond and primed my balsa.
Due to the nature of the work as some of you know, I didn't have time to photograph each step in the process. It was warm this day and my resin was starting to gel around 20 minutes.
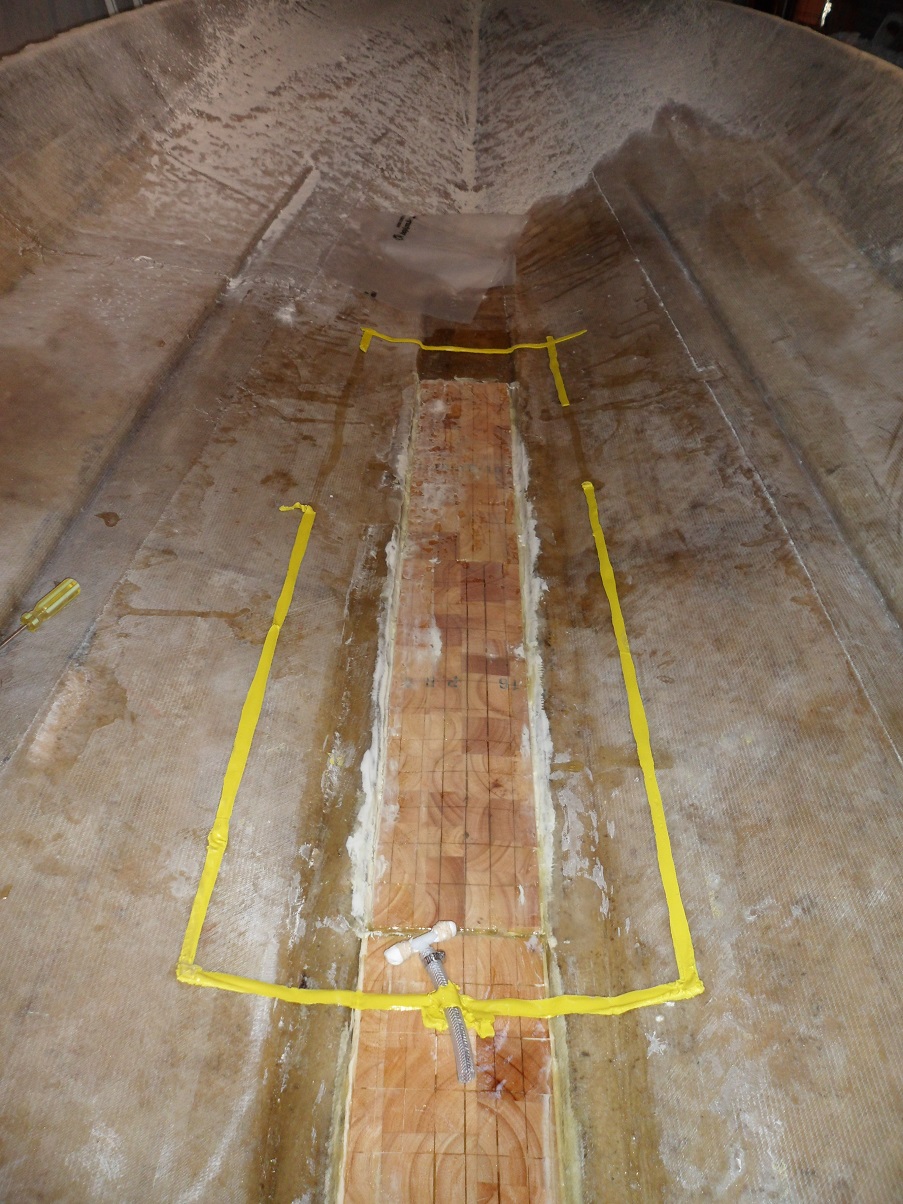
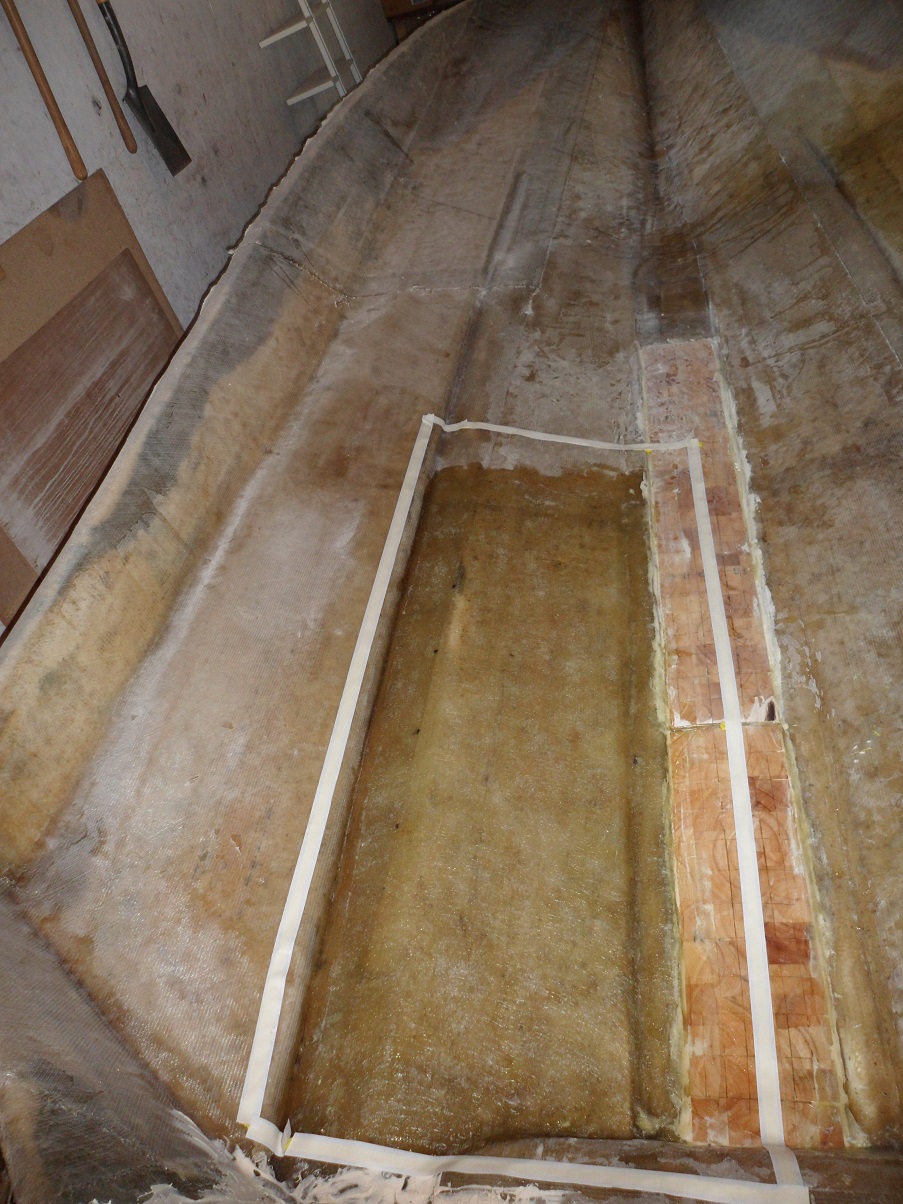
After I laid down the CSM, I encompassed the area with sealant tape. I went back to my work table and mixed up my resin for balsa priming, and smothered the balsa. Then prepped the CoreBond and troweled that into the pad. On went the balsa. Then went on the peel-ply. Then 2 layers of paper towel, then the bag. I'm actually using run-of-the-mill plastic vapor barrier you can buy at Home Depot, etc. Much much cheaper than bagging film, and works just the same, if not better. I found that bagging film was much stiffer - similar to cellophane than flexible plastic.
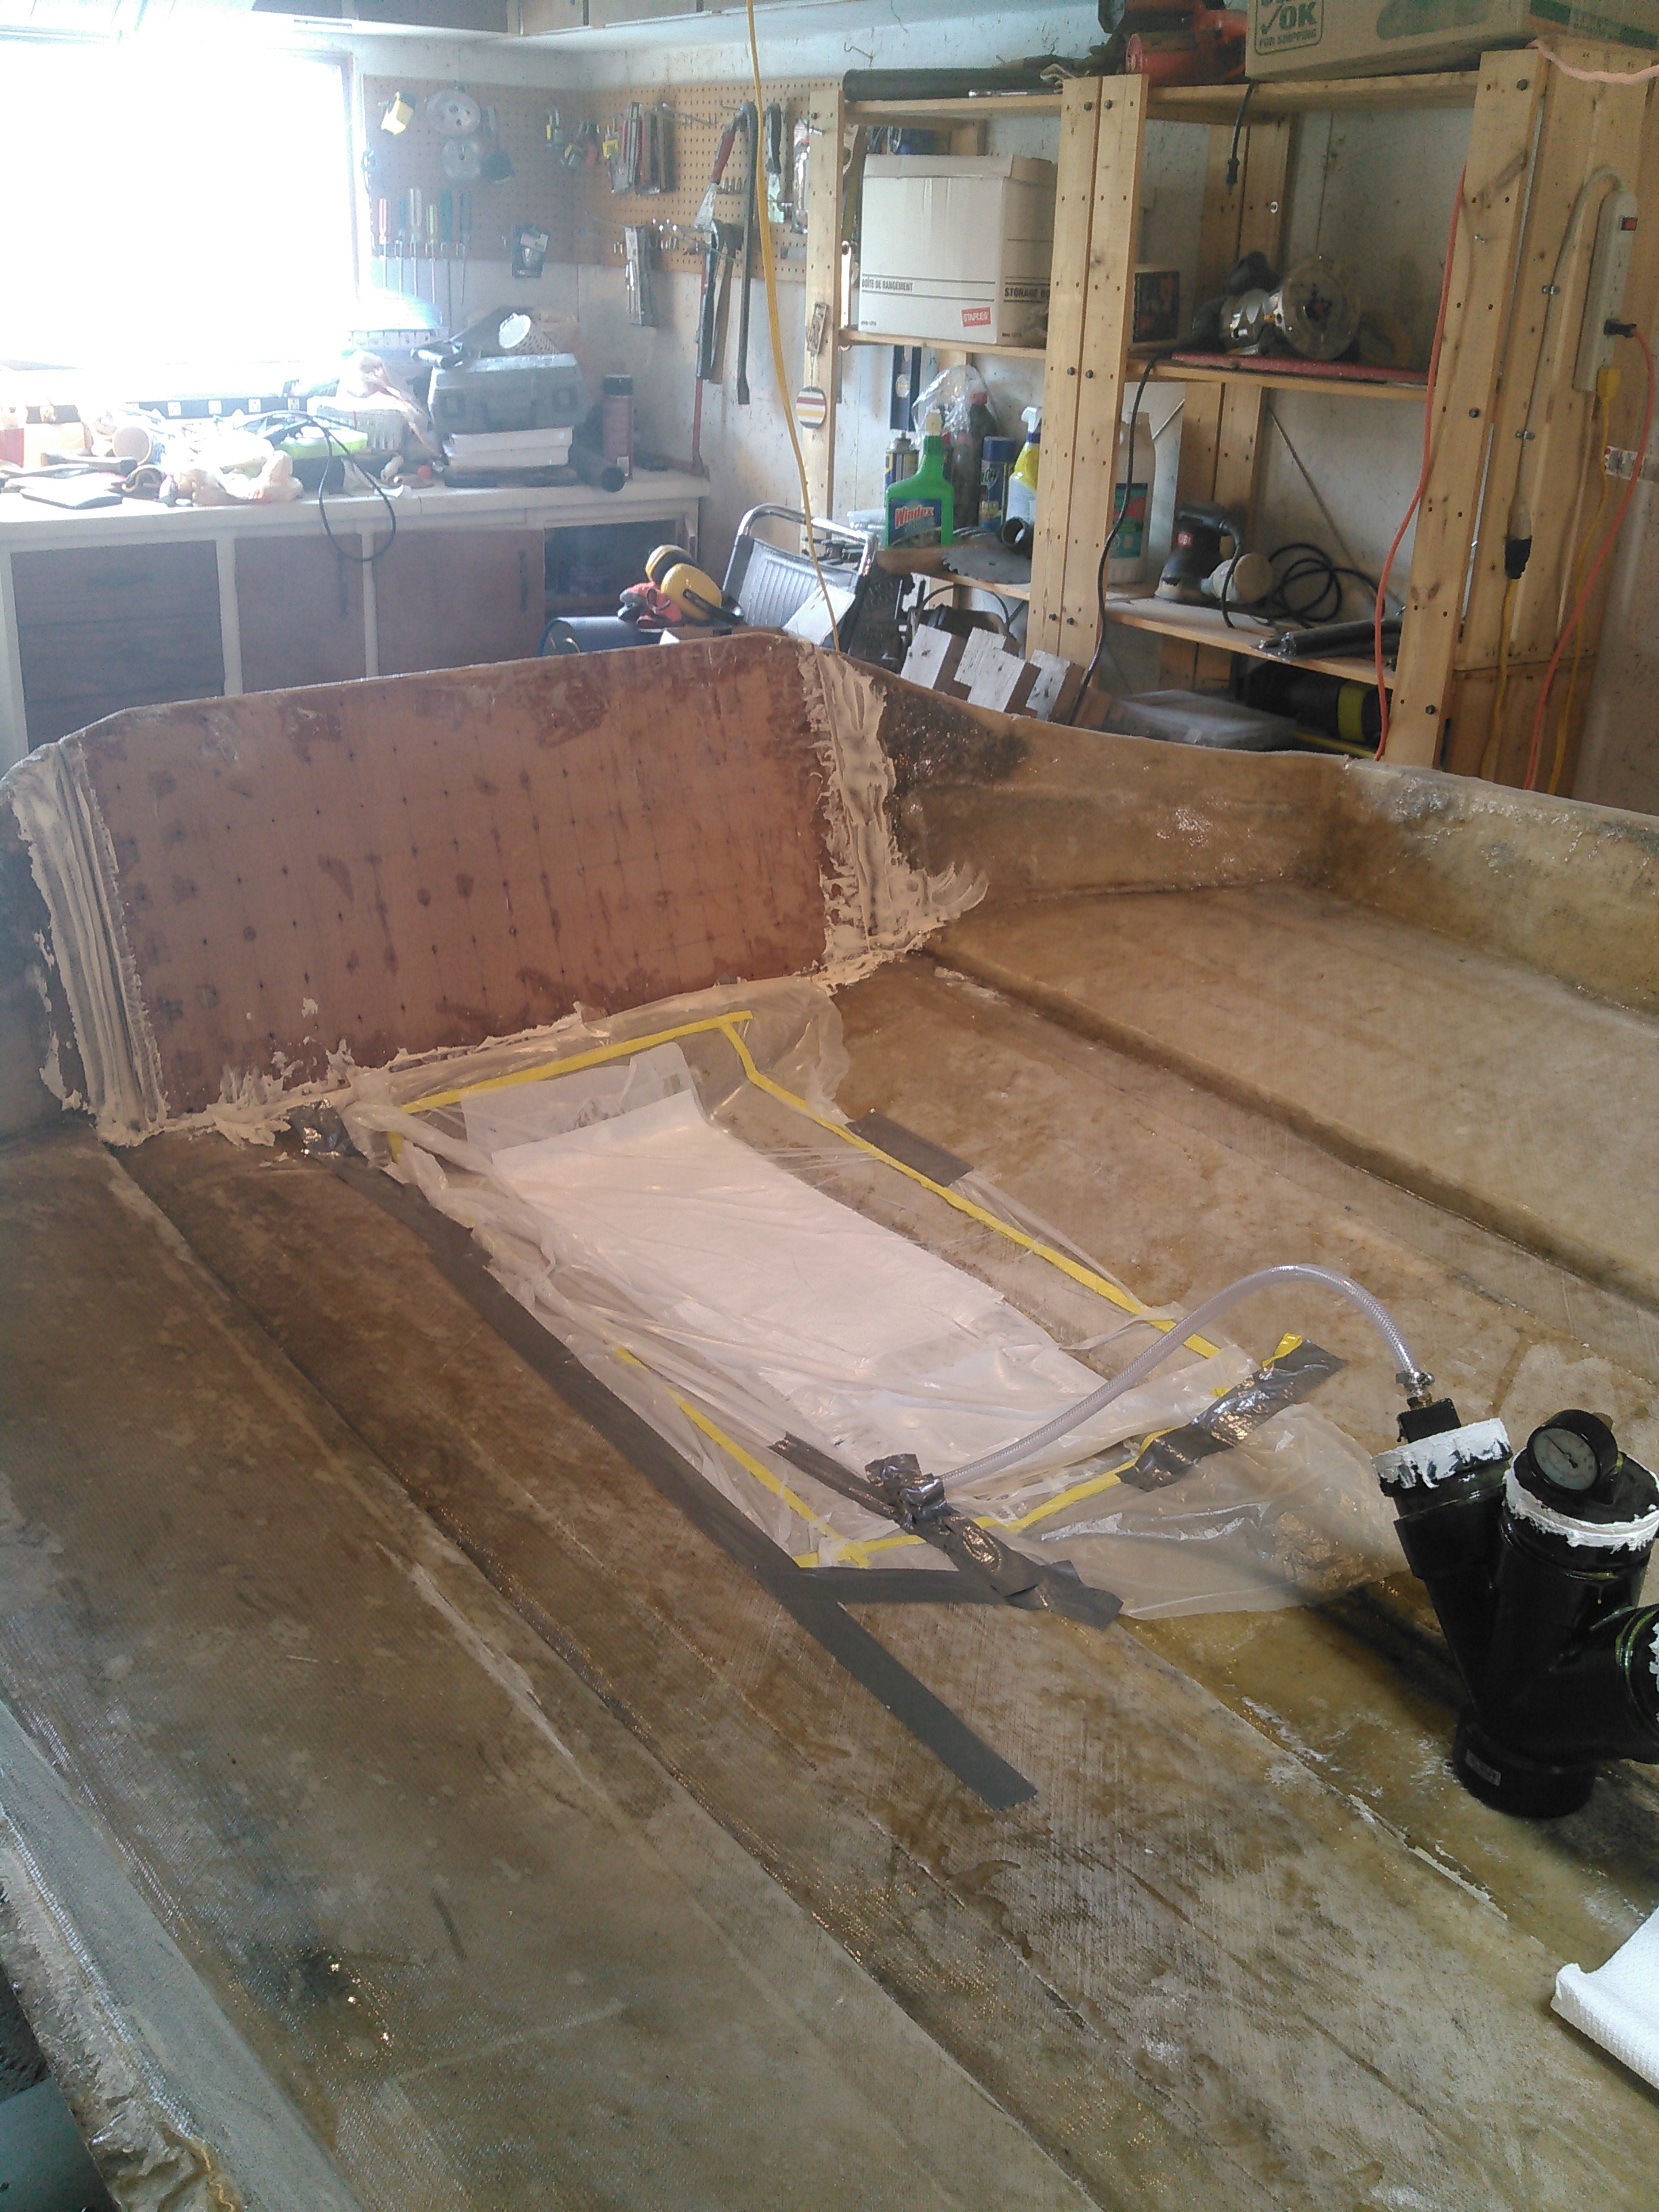
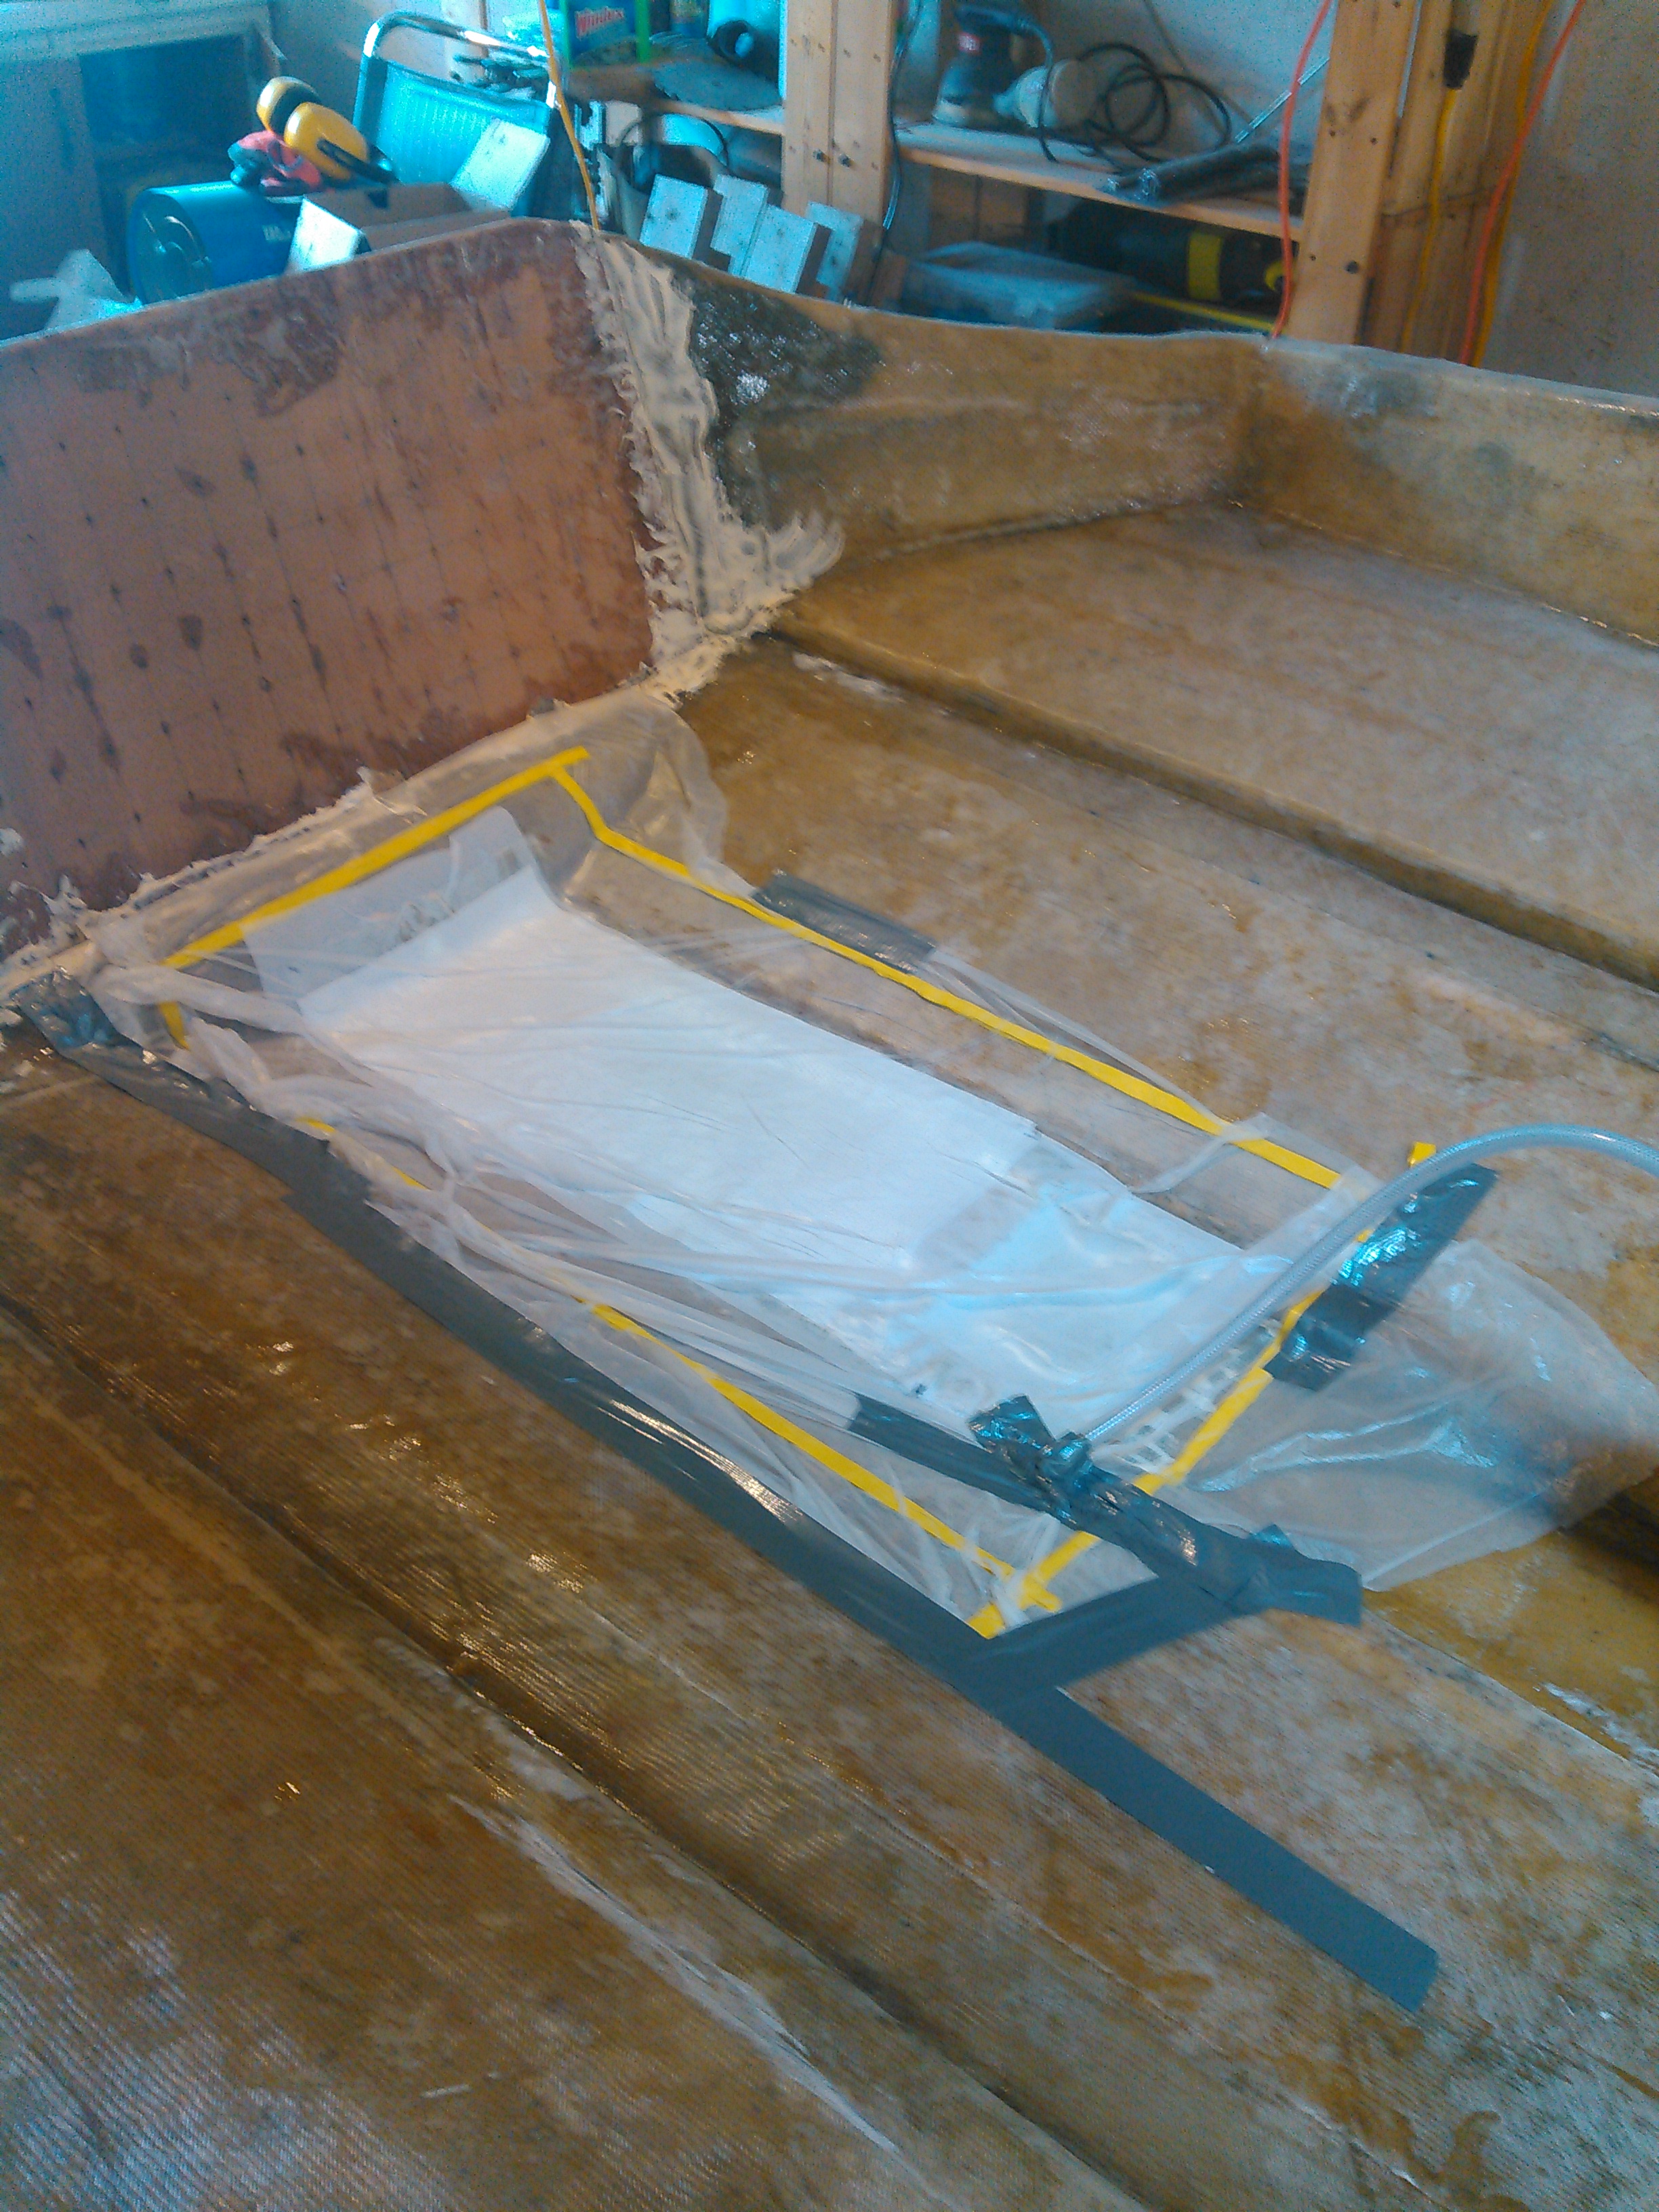
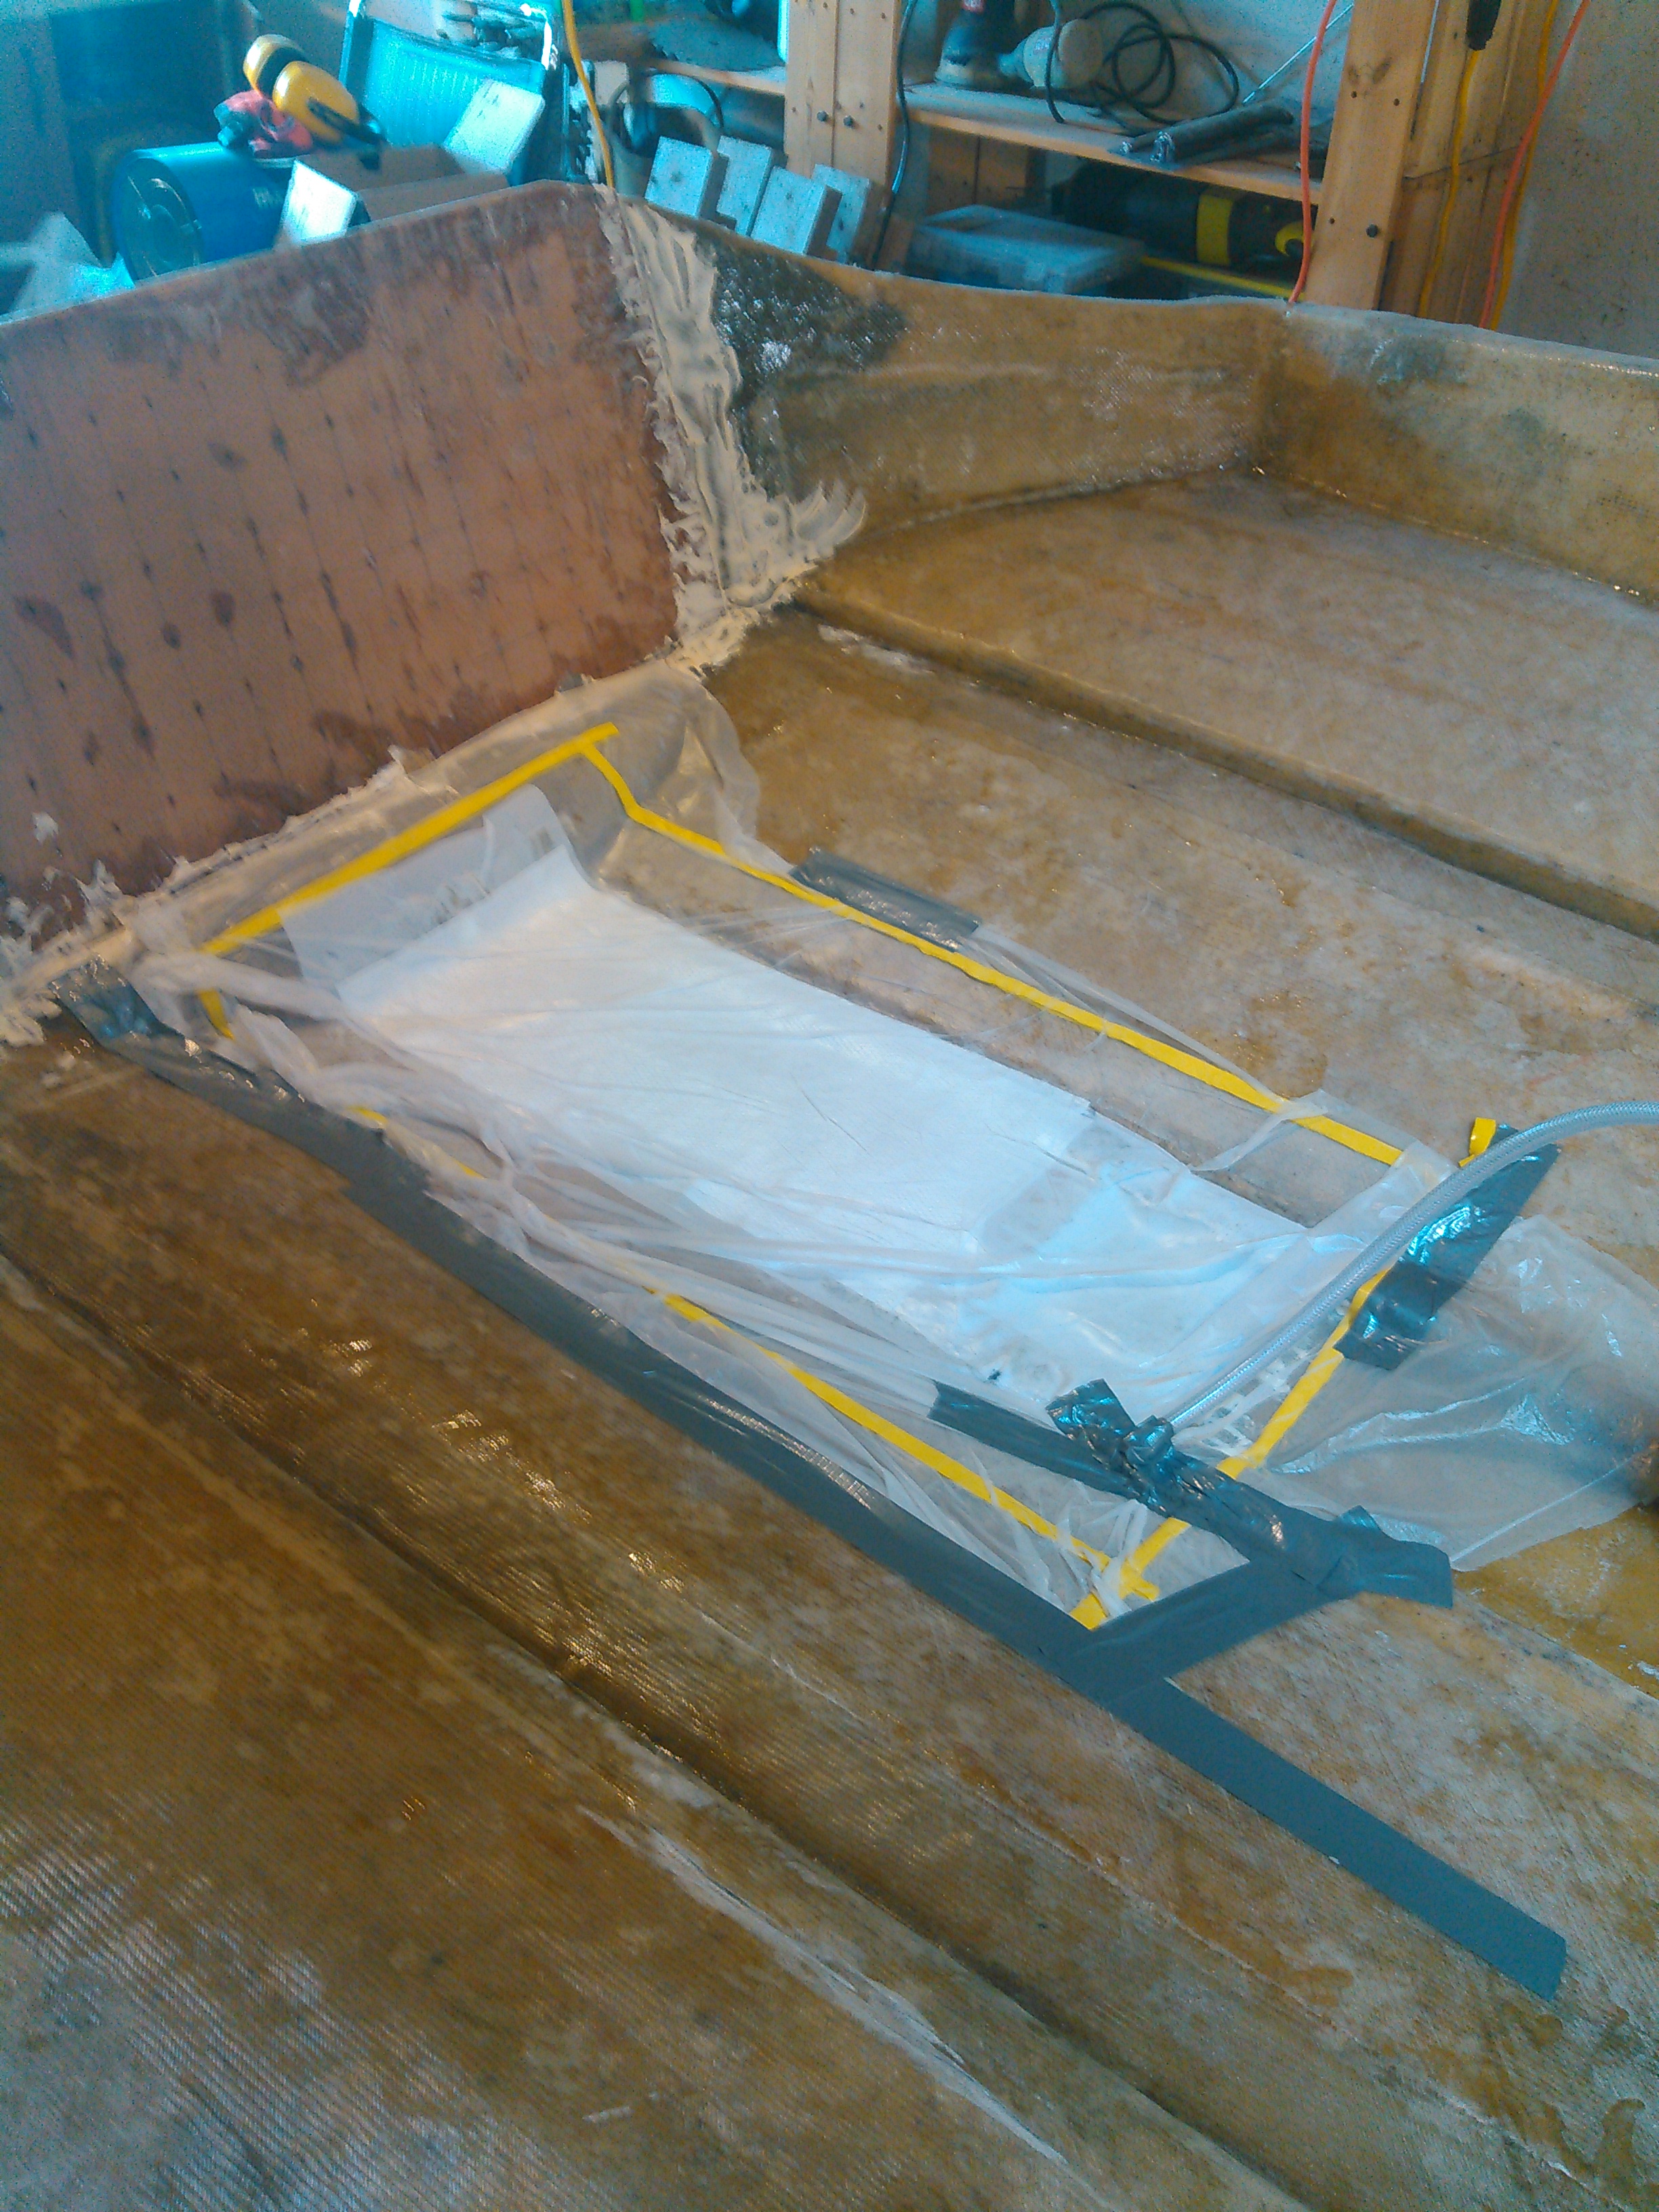
Not a perfect vacuum, but this still created several hundred pounds of "weight".
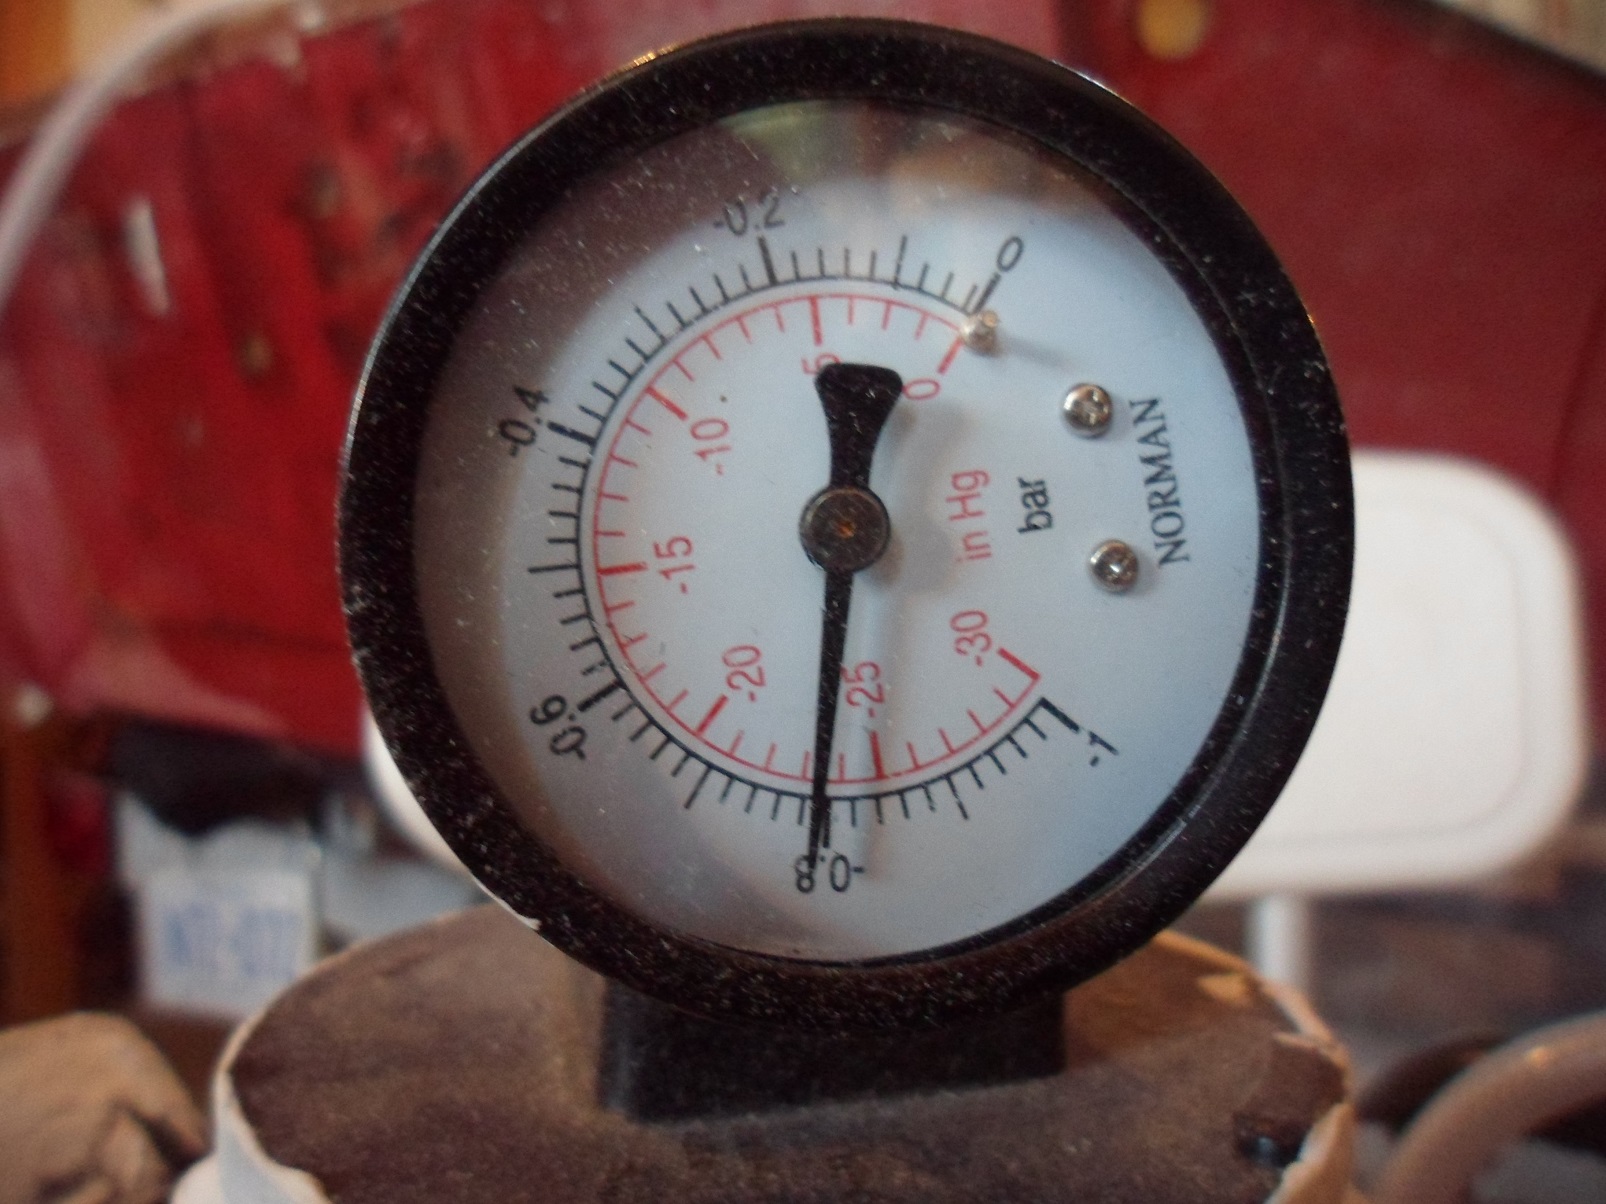
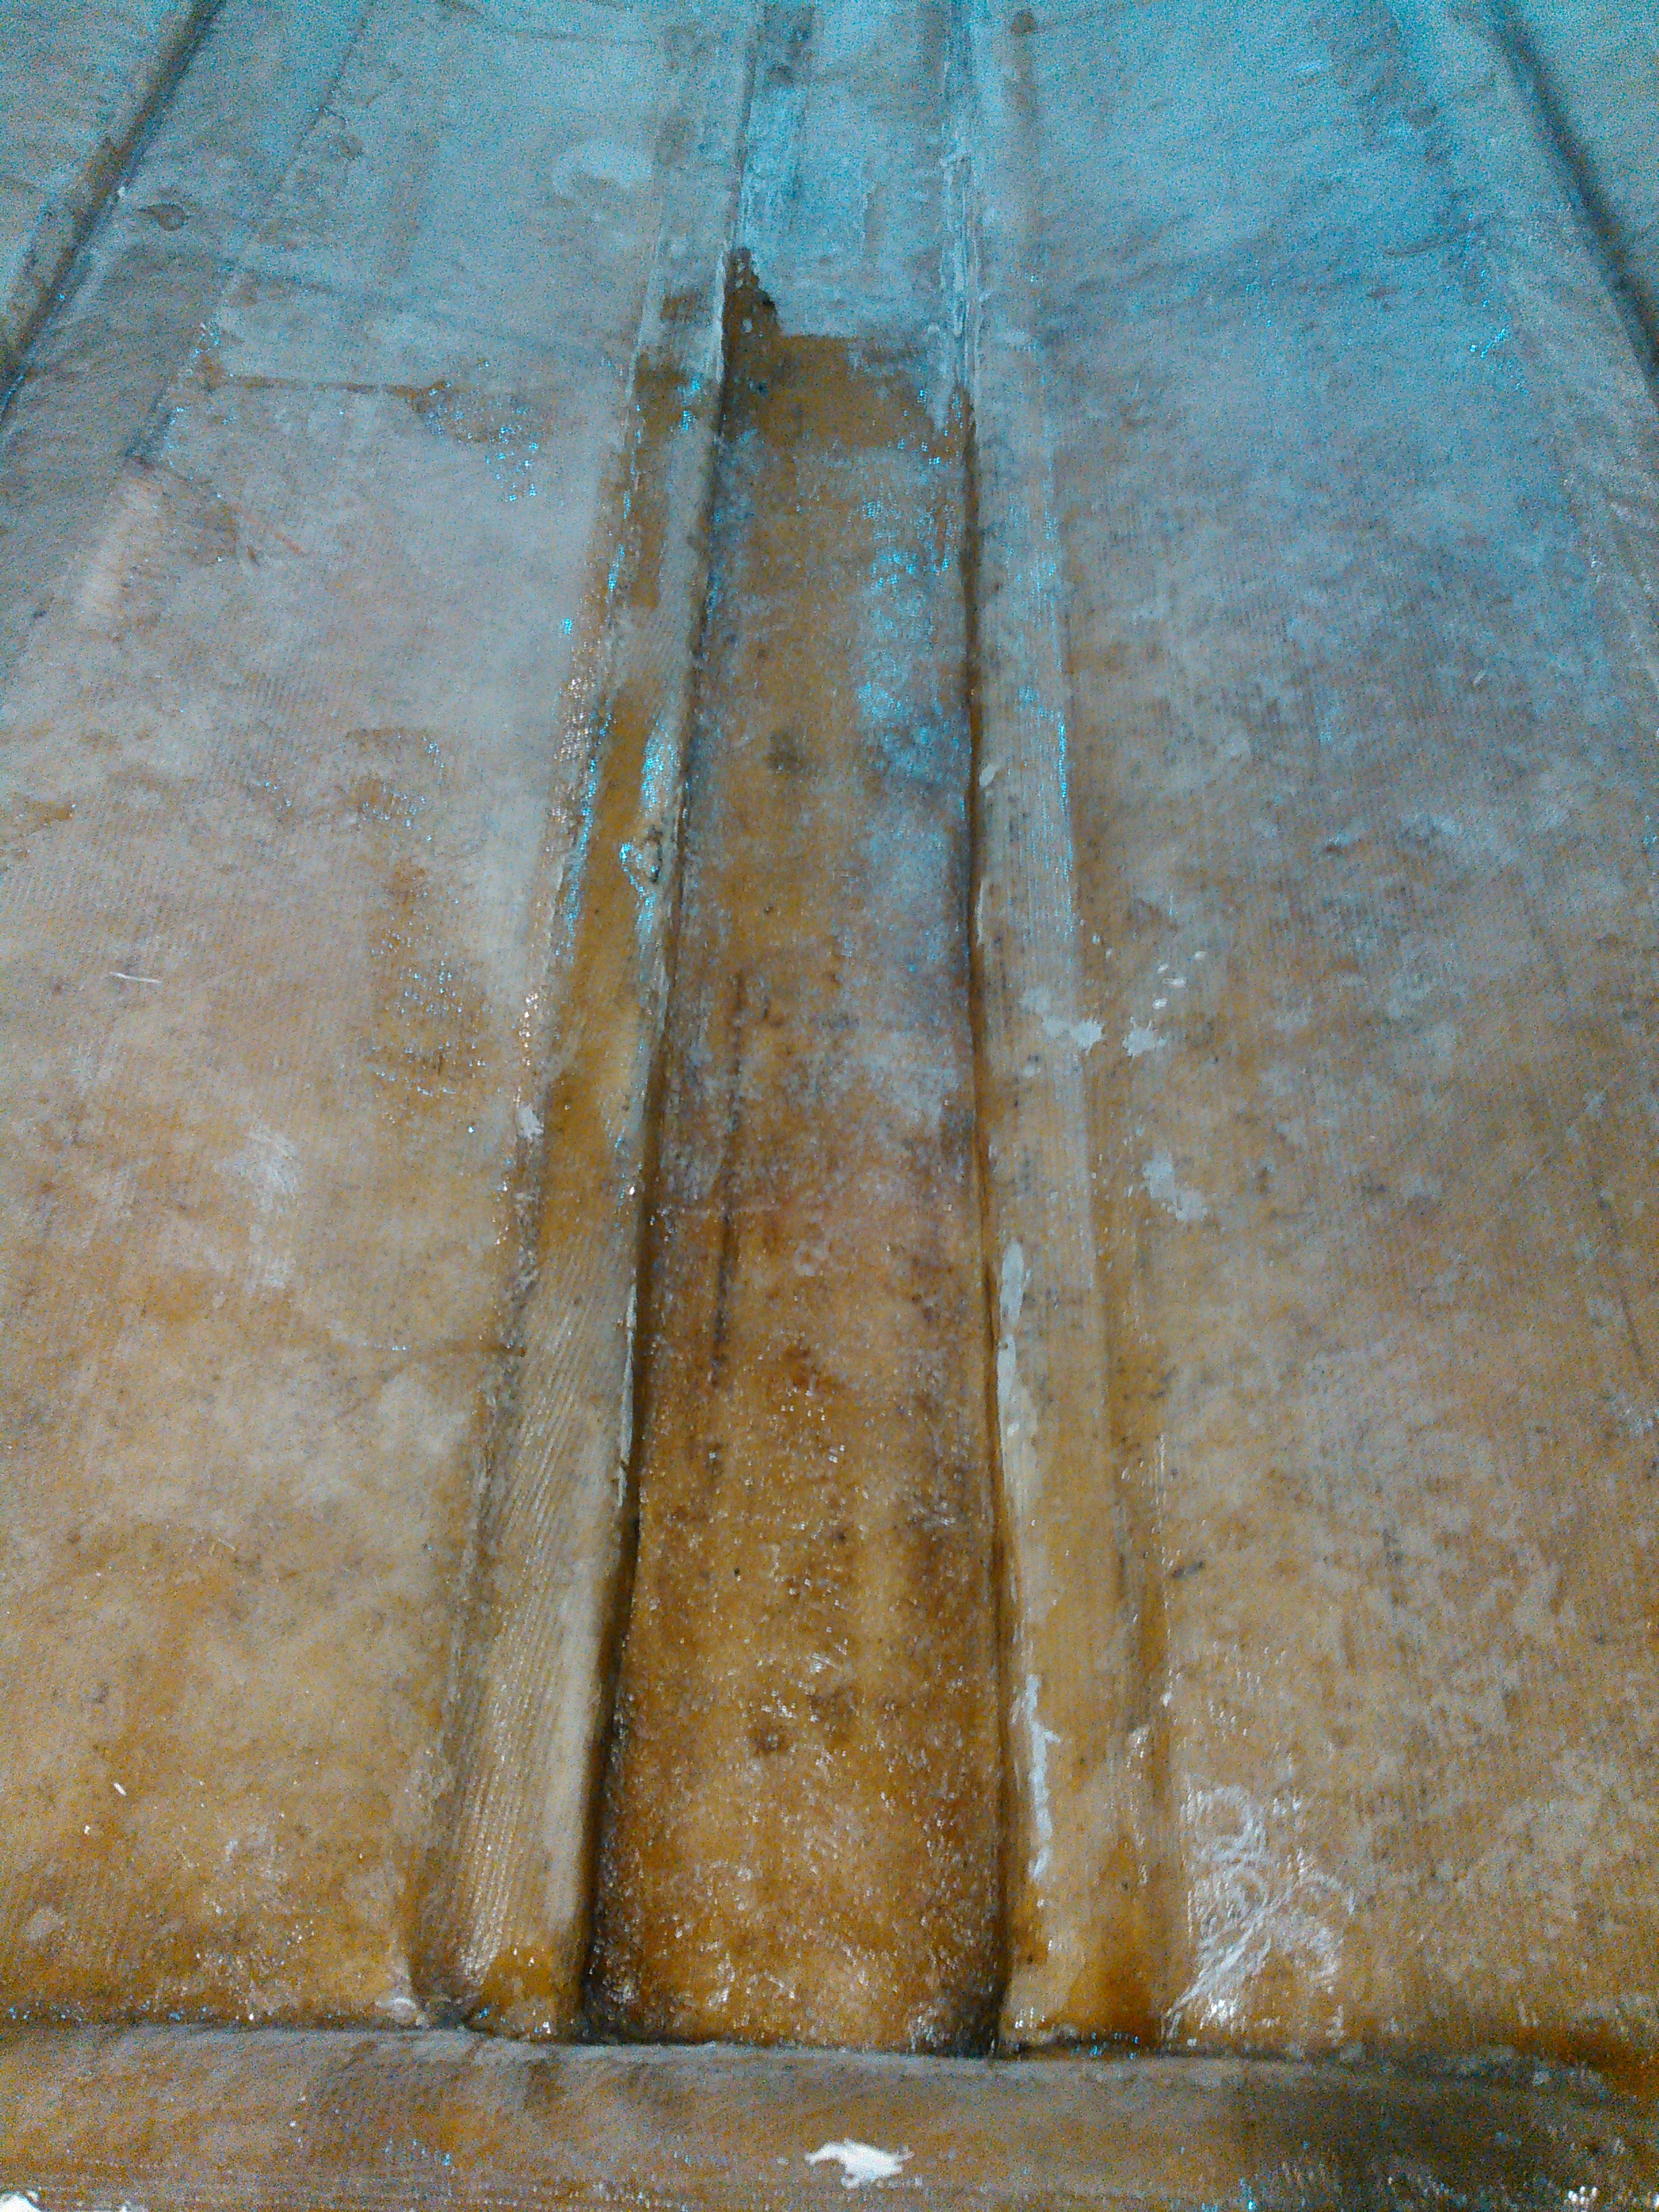
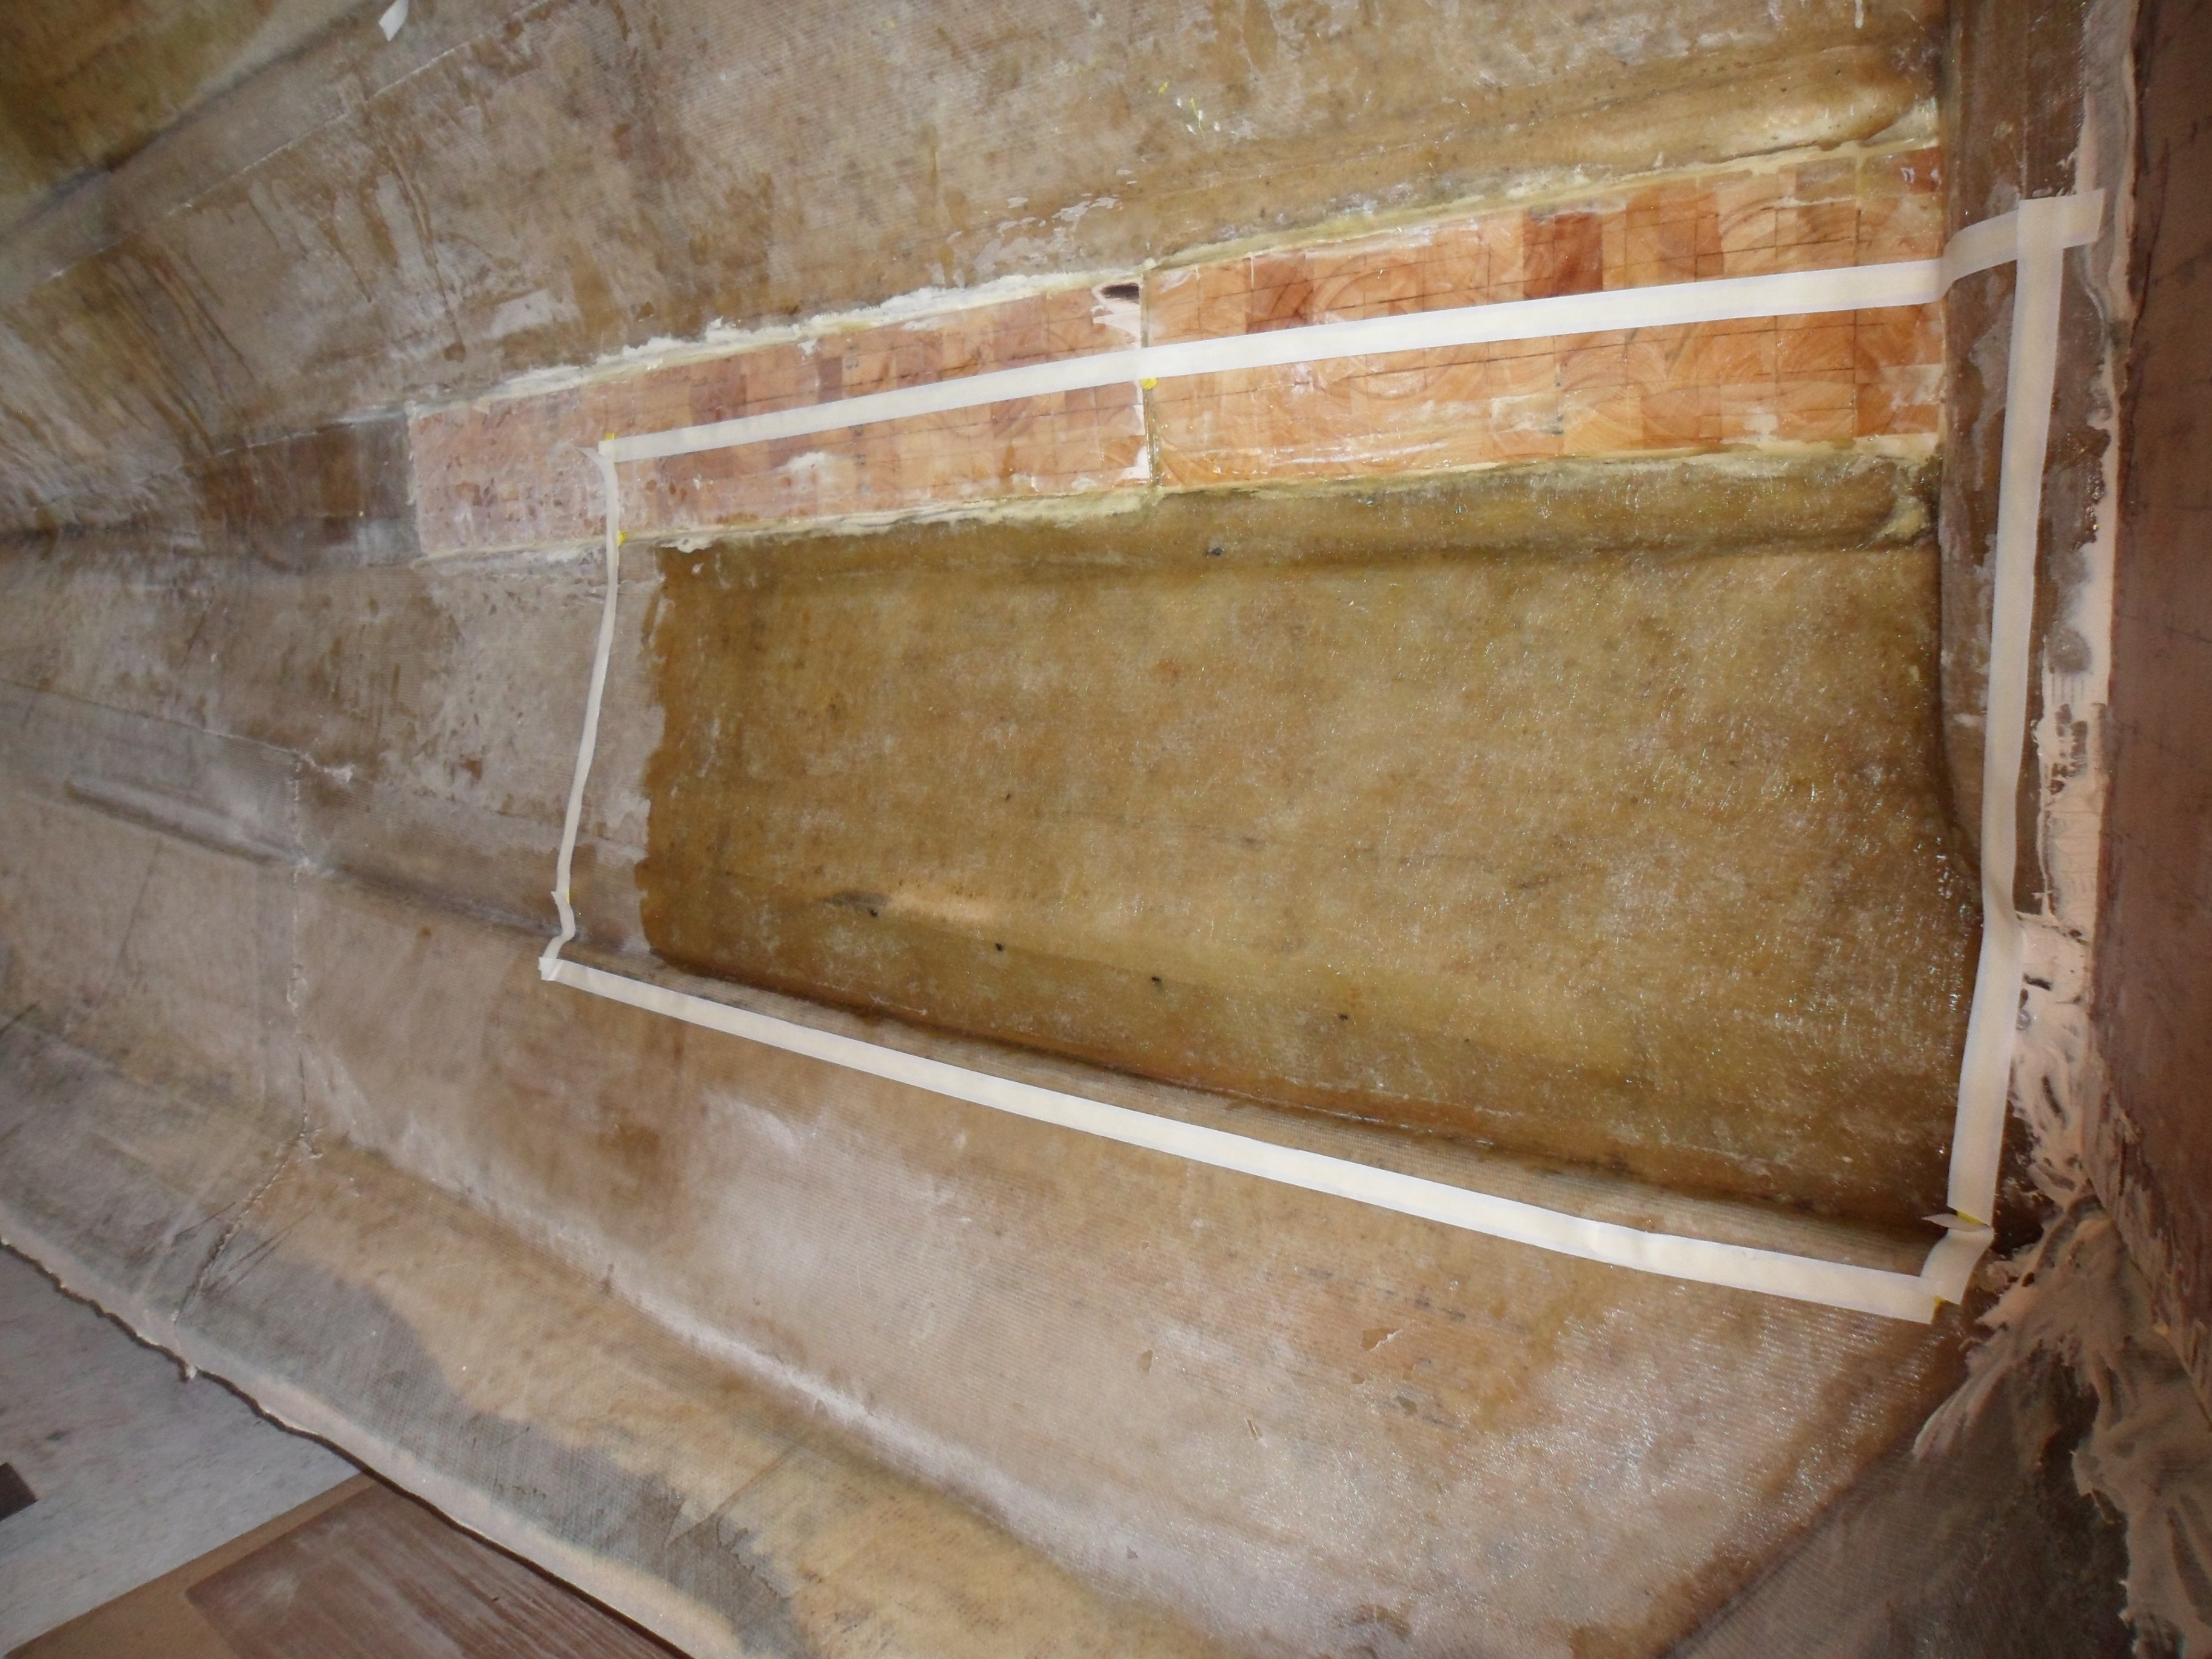
Let's see the result.
Shiny!

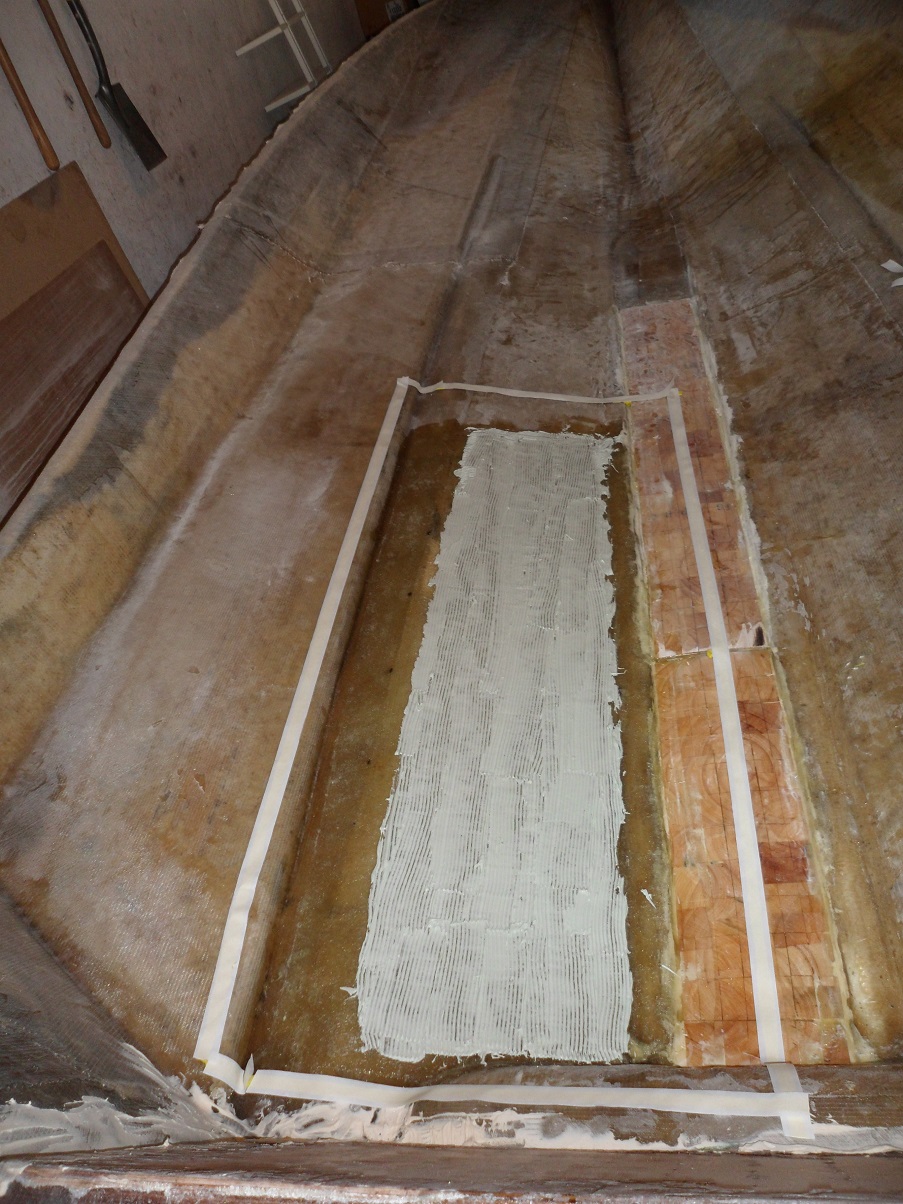
Continued working up the pad...
Second piece of core was a bit higher - I'll sand this down later...
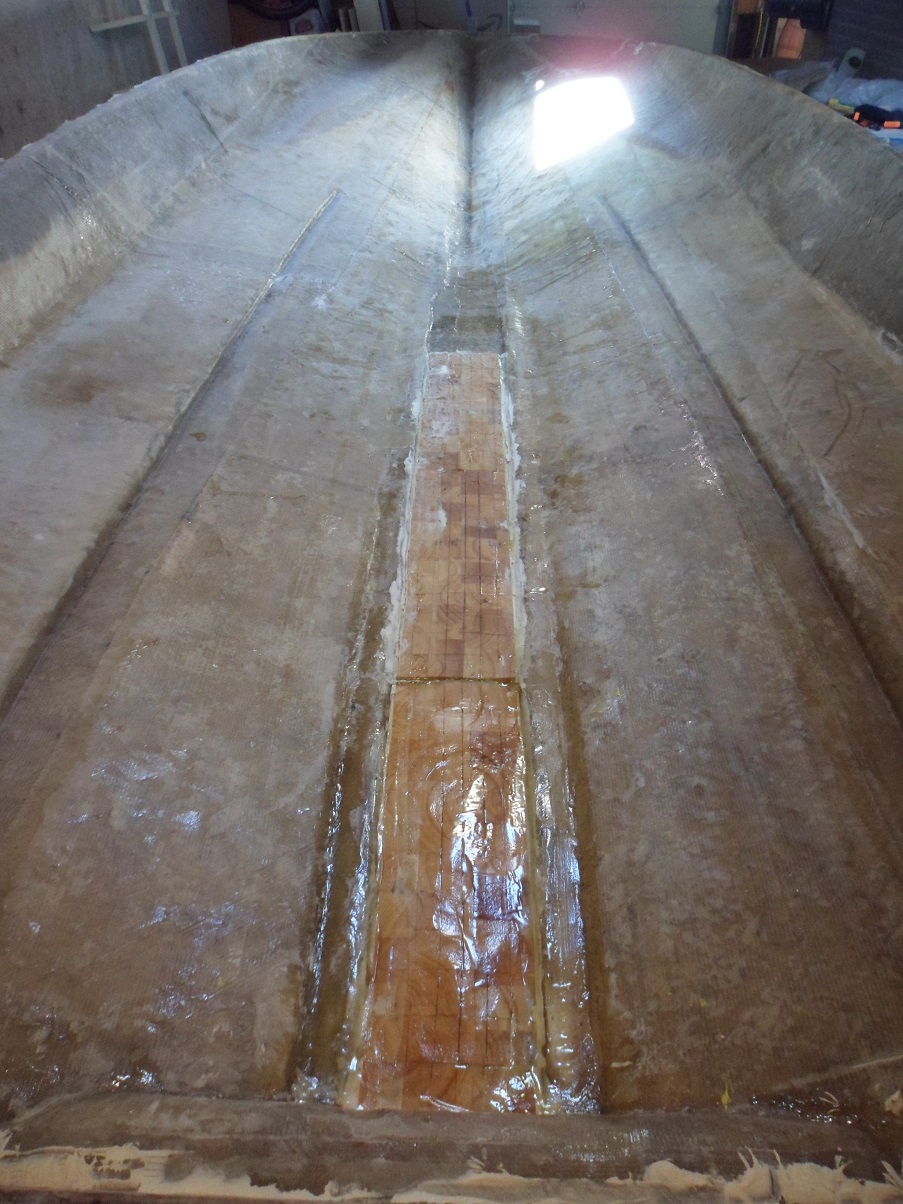
Then started on the port side. Light grind, sweep&vacuum, followed by layer of wetted-out CSM.
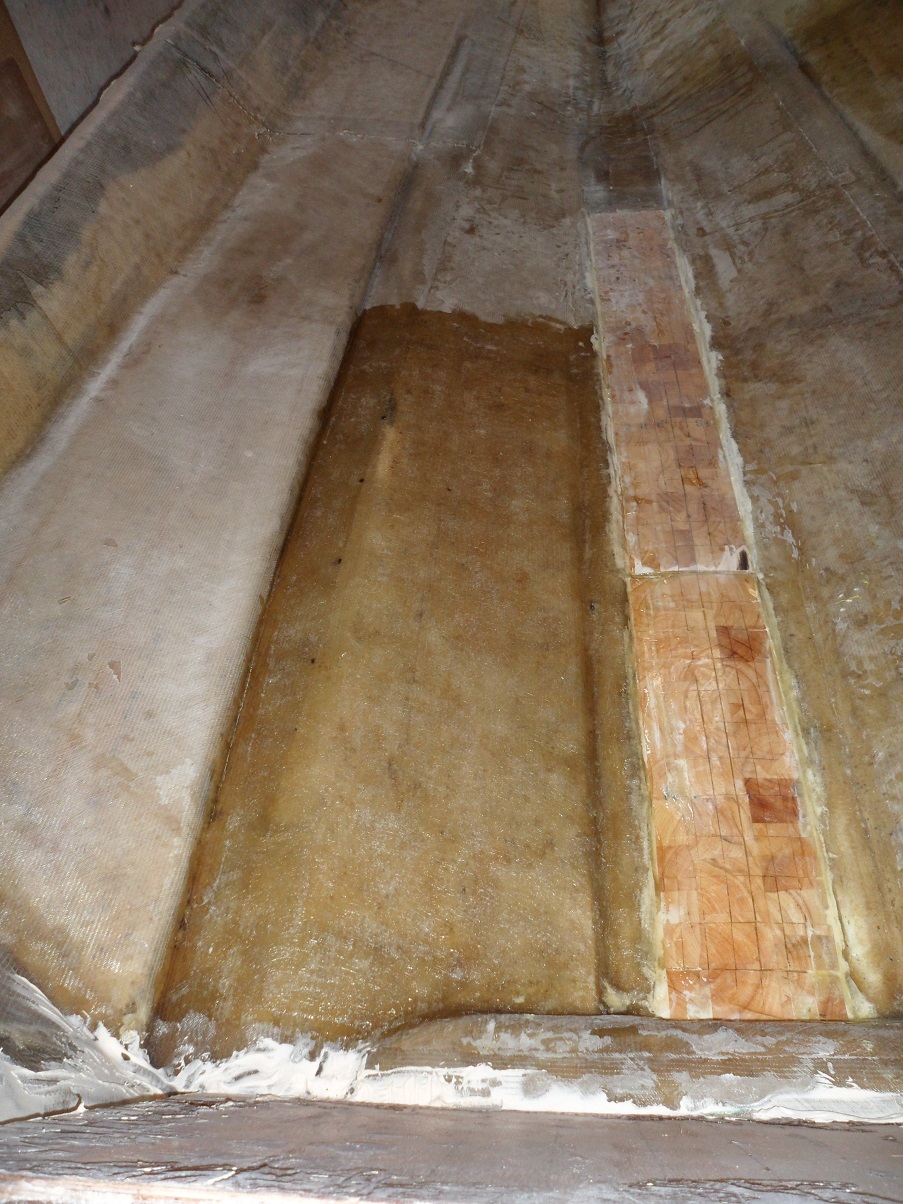

Unfortunately, this is all I got done before moving. Everything got packed up, and is still packed up. With having a new house, I never had time the rest of the summer and fall to work on her.
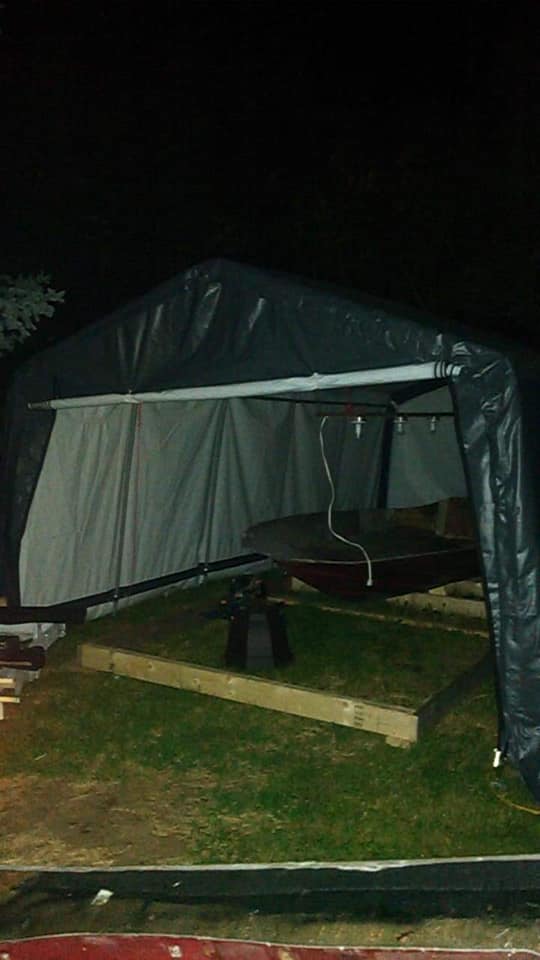
So she's sleeping in the backyard under her boat cover and heavy-duty tarp.
Hopefully winter will be short.
Until then.....
This work was done periodically between June 6th and roughly middle of July 2018. I was super busy with trying to find and buy a house, and packing up all my stuff.
---------------
Dealing with the gap between the transom skin and the new transom, I ended up using a prybar to gently widen the gap a few millimeters to allow resin to get down a bit deeper, and then clamped the hell out of it.
---------------
Now onto the (not so) fun stuff. Balsa core.
I should note that for this stage of my work, I'm using general purpose ortho polyester resin. I heard Vinylester doesn't play well with CoreBond under vacuum, so I went with poly.
Unfortunately with the house bullsh*t, my new glass had long since cured. So I knew id have to re-grind. Just a light job to create a mechanical bond. I started in the pad, scuffing the main surface while straightening the edges to fit the core.
Next I laid down a layer of CSM, and let that tack up while I prepped the bagging stuff, CoreBond and primed my balsa.
Due to the nature of the work as some of you know, I didn't have time to photograph each step in the process. It was warm this day and my resin was starting to gel around 20 minutes.
After I laid down the CSM, I encompassed the area with sealant tape. I went back to my work table and mixed up my resin for balsa priming, and smothered the balsa. Then prepped the CoreBond and troweled that into the pad. On went the balsa. Then went on the peel-ply. Then 2 layers of paper towel, then the bag. I'm actually using run-of-the-mill plastic vapor barrier you can buy at Home Depot, etc. Much much cheaper than bagging film, and works just the same, if not better. I found that bagging film was much stiffer - similar to cellophane than flexible plastic.
Not a perfect vacuum, but this still created several hundred pounds of "weight".
Let's see the result.
Shiny!
Continued working up the pad...
Second piece of core was a bit higher - I'll sand this down later...
Then started on the port side. Light grind, sweep&vacuum, followed by layer of wetted-out CSM.
Unfortunately, this is all I got done before moving. Everything got packed up, and is still packed up. With having a new house, I never had time the rest of the summer and fall to work on her.
So she's sleeping in the backyard under her boat cover and heavy-duty tarp.
Hopefully winter will be short.
Until then.....
-
 Hippie459MN
- Site Admin

- Posts: 4002
- Joined: Mar 25, 2009 7:31 pm
- Location: Nowthen, MN
- Has thanked: 364 times
- Been thanked: 86 times
- Contact:
Re: 1980 Viper Rebirth
Looks awesome. 
-Kevin
Project Vulture | Project Vector | Project Vamp | Project Vixen
The Vulture Wish List | Project CobraJet
1977 HydroStream Vulture - Worlds longest ongoing project.
1982 Hydrostream Vector
1982 Hydrostream Vamp
1973 Hydrostream Vixen
1976 CobraJet Jet Boat - Outboard conversion project
1976 Pontoon - aka The Family Truckster
-
AdamDK
- Moderator
- Posts: 327
- Joined: Jul 19, 2016 6:58 pm
- Location: Oshawa, Ontario (near Toronto)
- Has thanked: 45 times
- Been thanked: 73 times
Re: 1980 Viper Rebirth
Well at least now I can work in any weather....
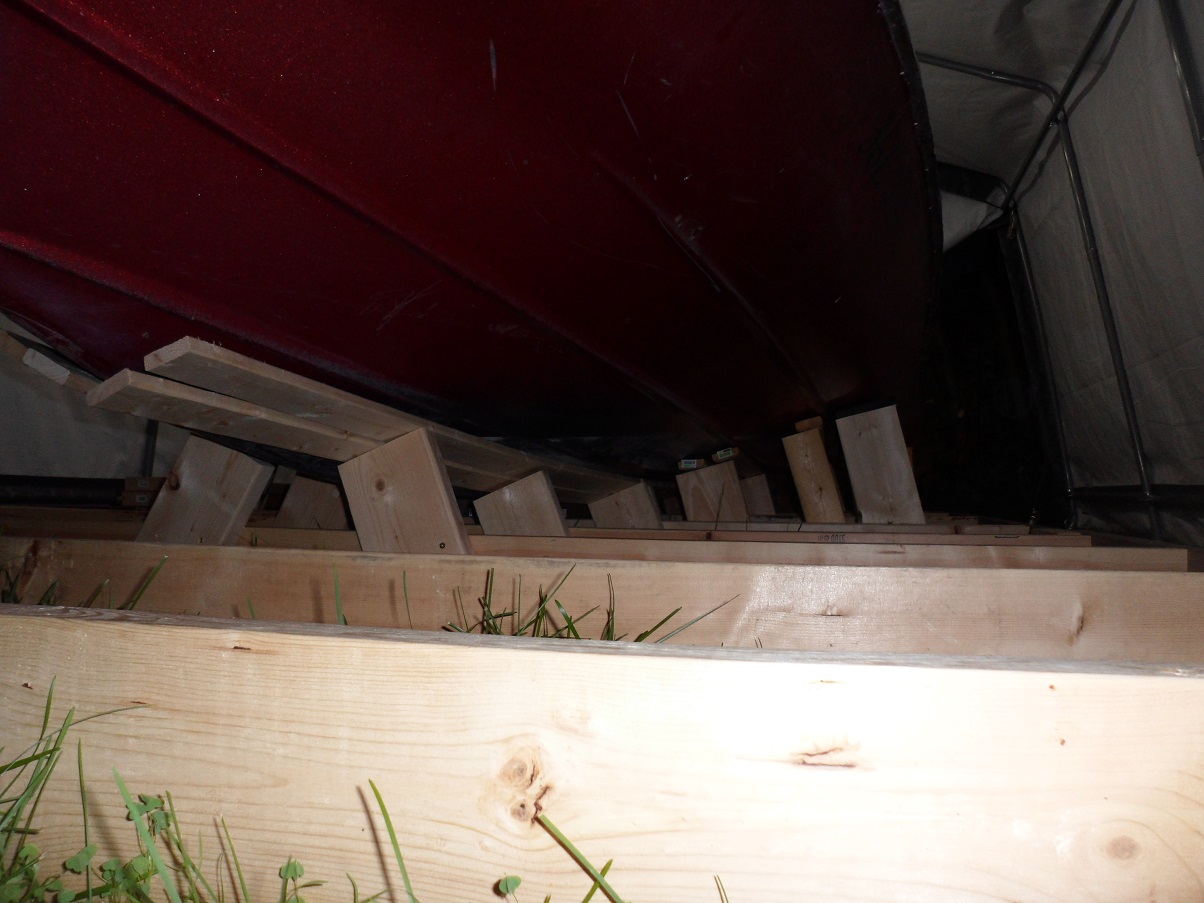
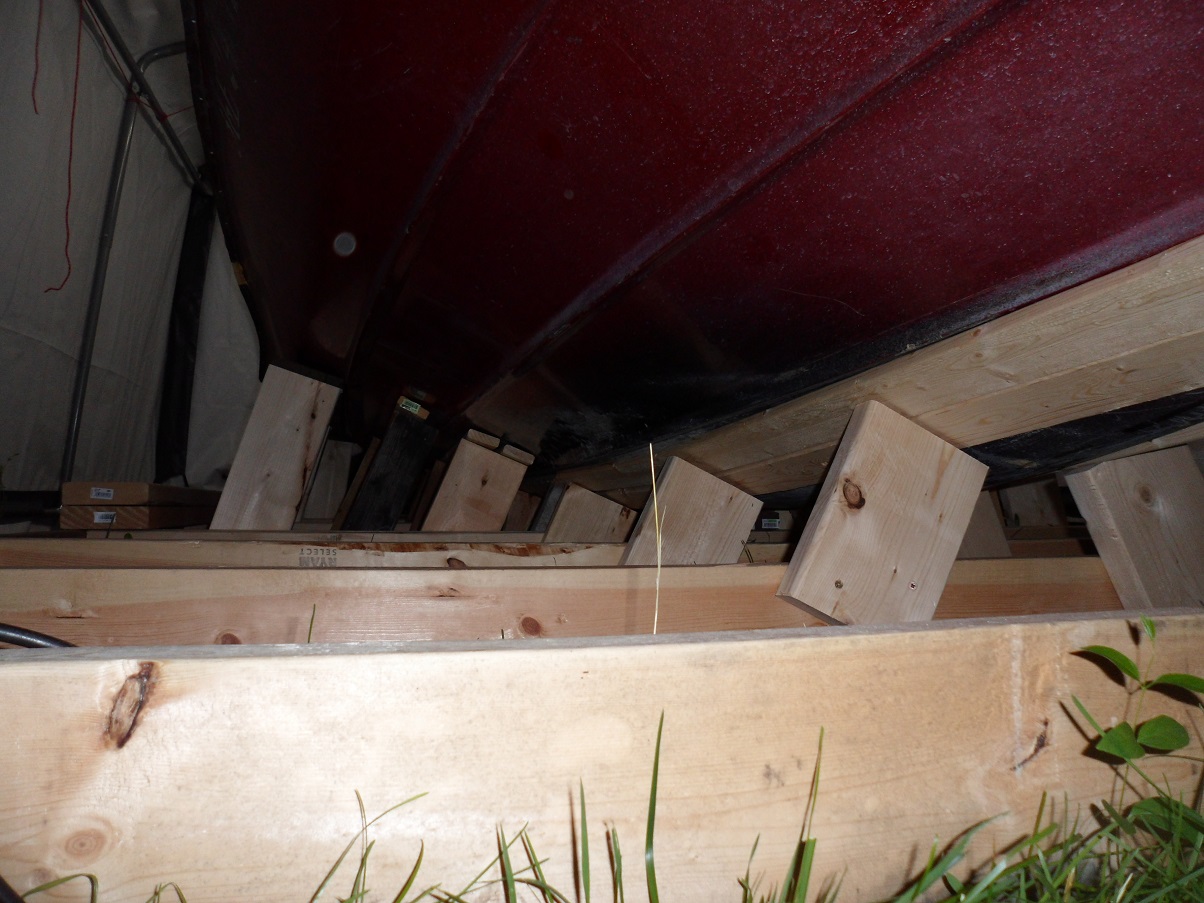
Time to build a new cradle like I had at my cousin's farm 3 years ago.
[ Post made via Android ]
Time to build a new cradle like I had at my cousin's farm 3 years ago.
[ Post made via Android ]
- Attachments
-
- KIMG0303.jpg (1.88 MiB) Viewed 12764 times
-
- KIMG0302.jpg (2.7 MiB) Viewed 12764 times
-
Hippie459MN
- Site Admin
- Posts: 4002
- Joined: Mar 25, 2009 7:31 pm
- Location: Nowthen, MN
- Has thanked: 364 times
- Been thanked: 86 times
- Contact:
Re: 1980 Viper Rebirth
Awesome! Cant wait to see you back at it. 
-Kevin
Project Vulture | Project Vector | Project Vamp | Project Vixen
The Vulture Wish List | Project CobraJet
1977 HydroStream Vulture - Worlds longest ongoing project.
1982 Hydrostream Vector
1982 Hydrostream Vamp
1973 Hydrostream Vixen
1976 CobraJet Jet Boat - Outboard conversion project
1976 Pontoon - aka The Family Truckster
Project Vulture | Project Vector | Project Vamp | Project Vixen
The Vulture Wish List | Project CobraJet
1977 HydroStream Vulture - Worlds longest ongoing project.
1982 Hydrostream Vector
1982 Hydrostream Vamp
1973 Hydrostream Vixen
1976 CobraJet Jet Boat - Outboard conversion project
1976 Pontoon - aka The Family Truckster
-
AdamDK
- Moderator
- Posts: 327
- Joined: Jul 19, 2016 6:58 pm
- Location: Oshawa, Ontario (near Toronto)
- Has thanked: 45 times
- Been thanked: 73 times
Re: 1980 Viper Rebirth
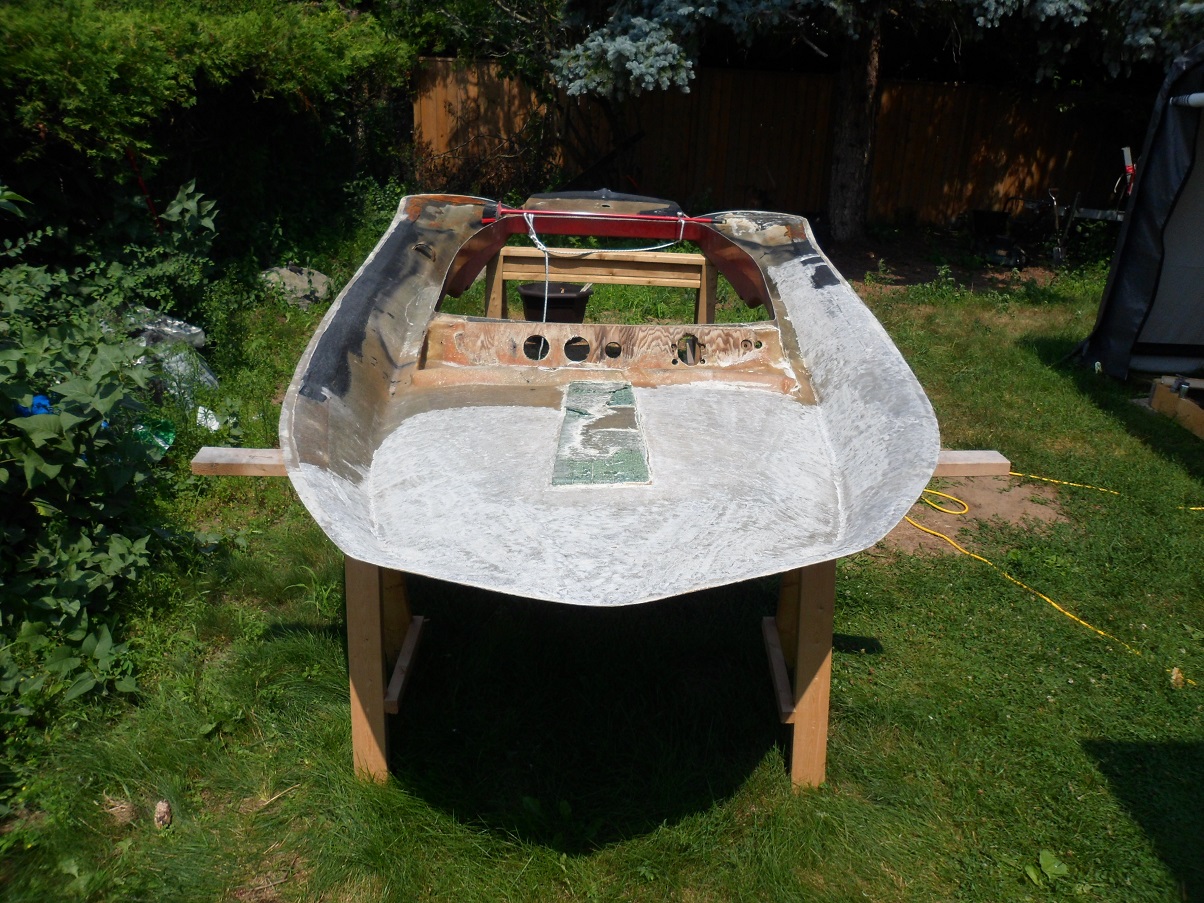
Built a "light" for my shelter. Powered by five 9-watt LED bulbs @ 800 lumens each. 4000 lumens total.
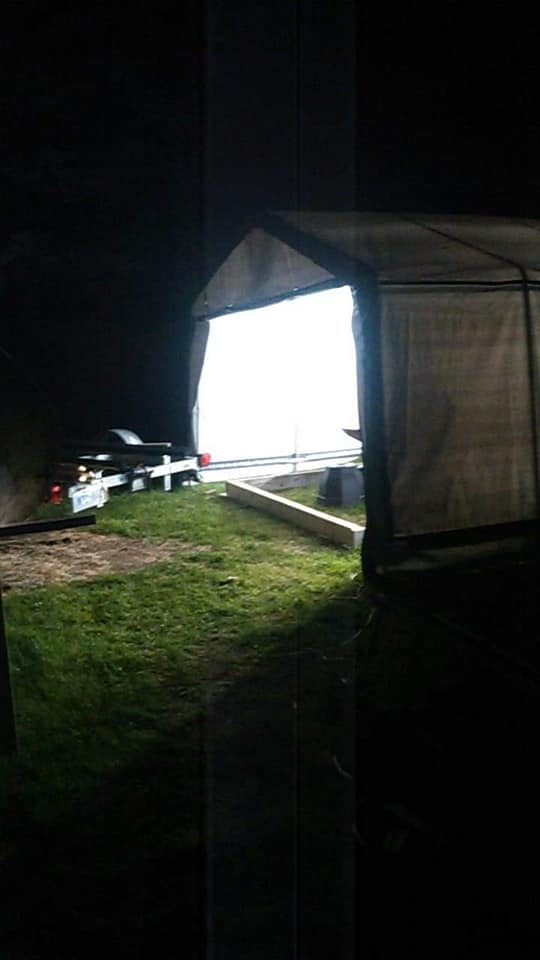
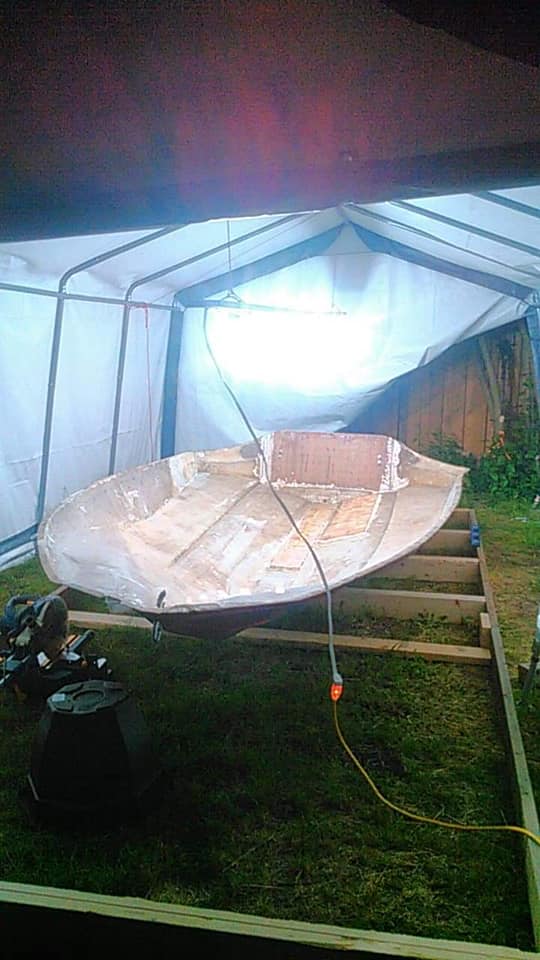
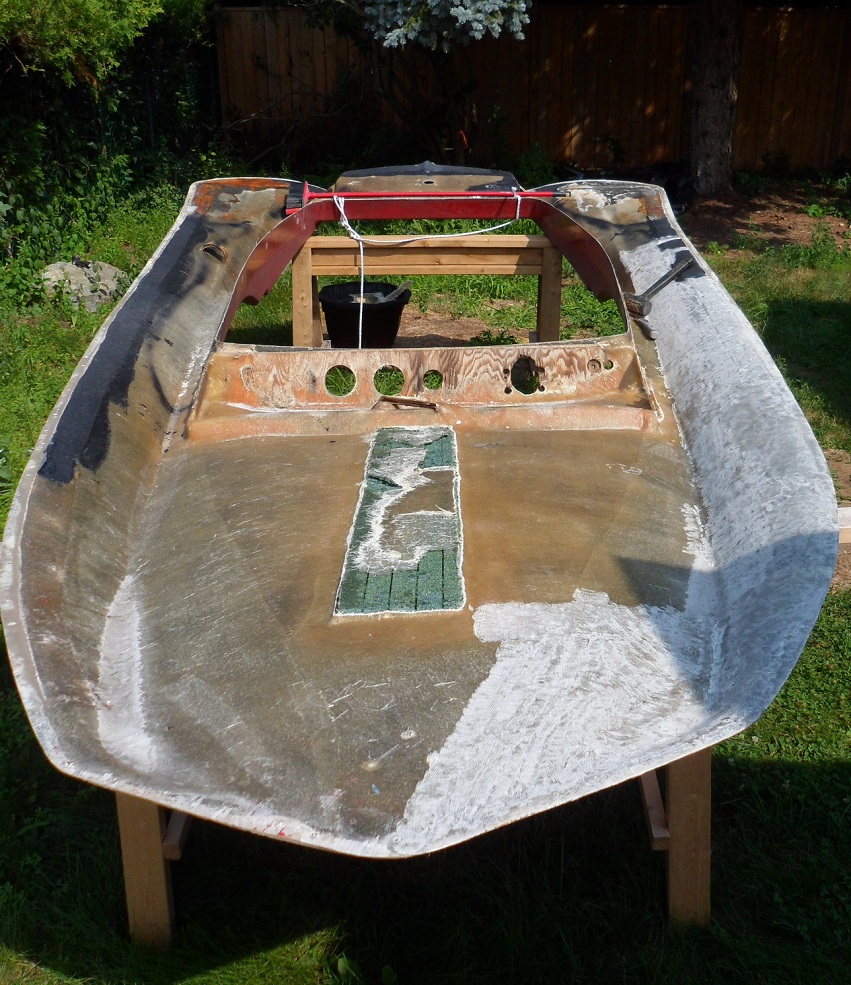
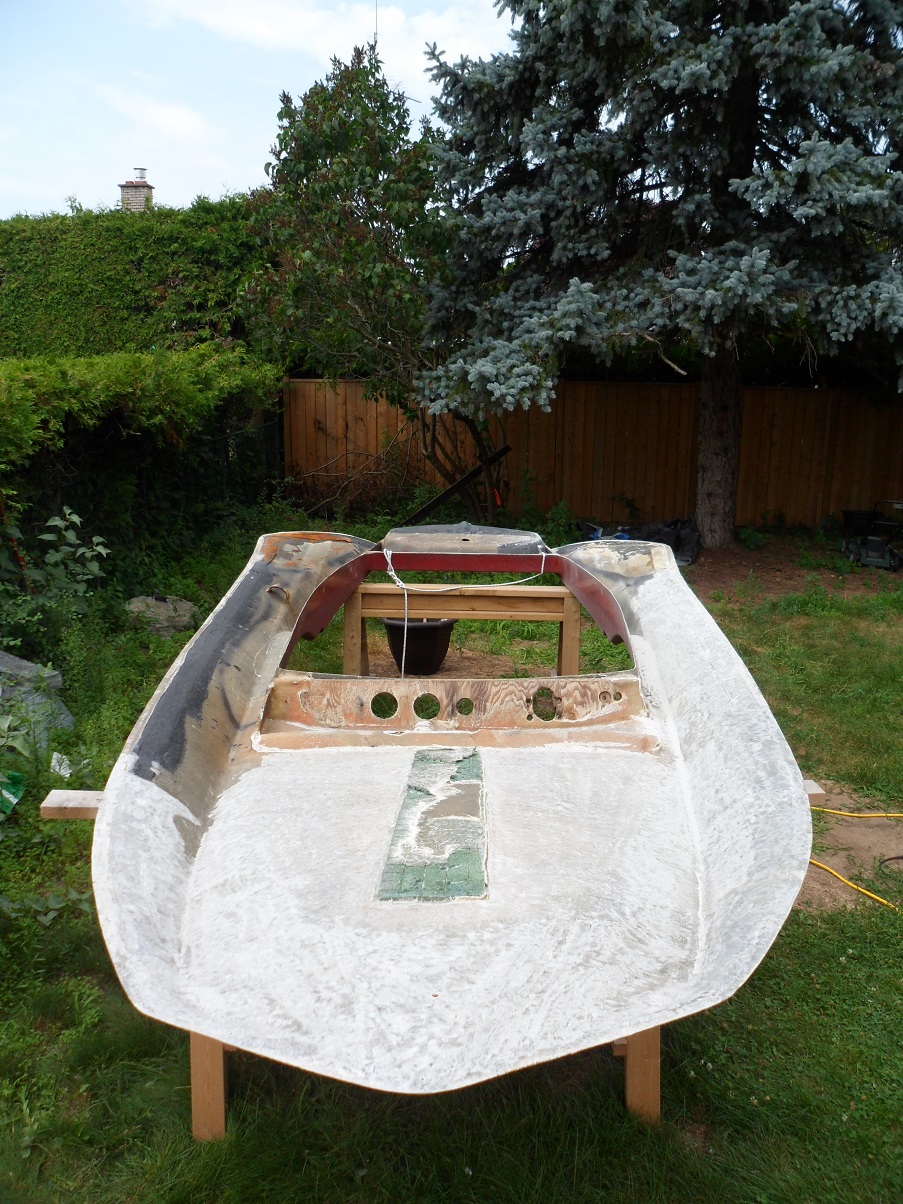
Finished the cradle. Didn't see a point in adding more supports under the bow as this isn't a weight-bearing area....i.e. i wont be stepping/standing there.
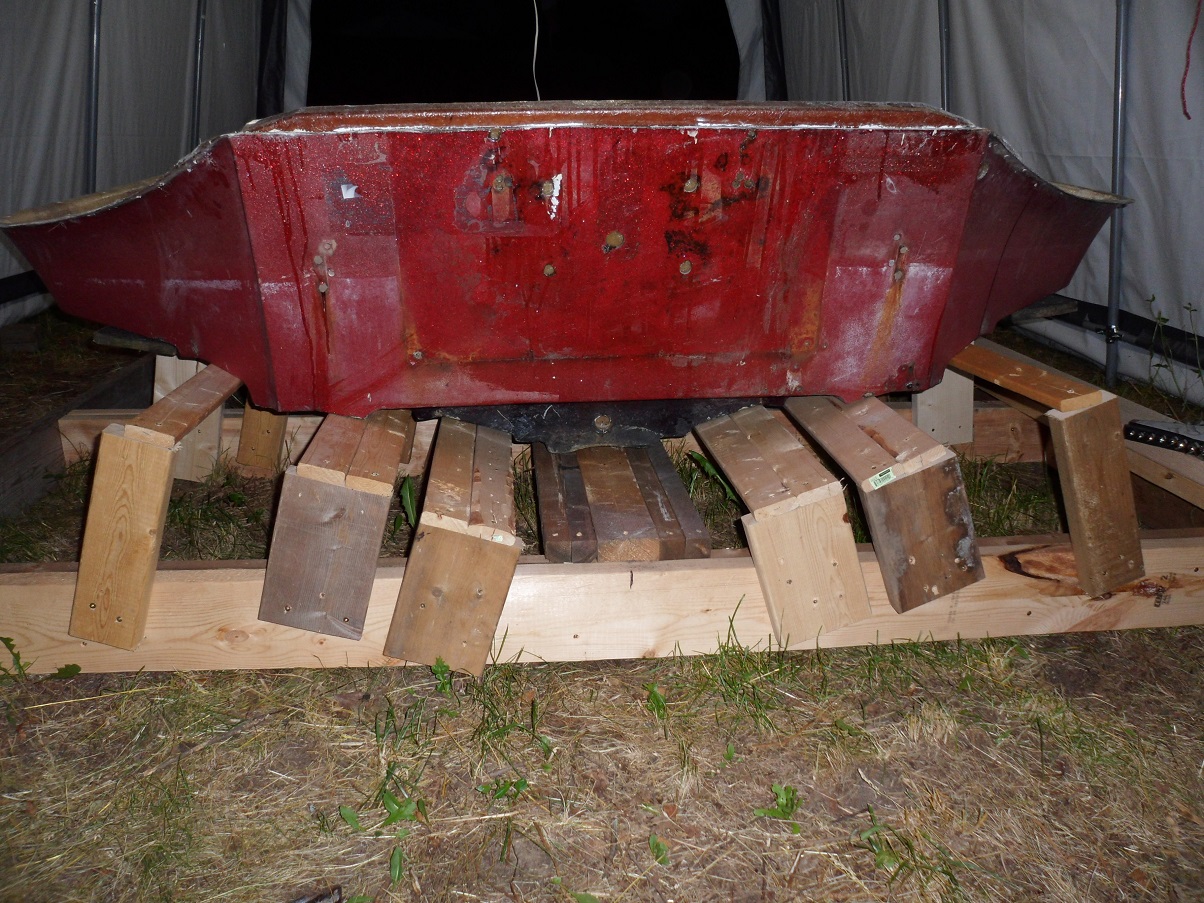
Next is to break out the sander & grinder and clean up the mess of corebond around the transom and balsa, and get back to prepping the glass for more balsa vacuum-bagging.
Finished the cradle. Didn't see a point in adding more supports under the bow as this isn't a weight-bearing area....i.e. i wont be stepping/standing there.
Next is to break out the sander & grinder and clean up the mess of corebond around the transom and balsa, and get back to prepping the glass for more balsa vacuum-bagging.

-
AdamDK
- Moderator
- Posts: 327
- Joined: Jul 19, 2016 6:58 pm
- Location: Oshawa, Ontario (near Toronto)
- Has thanked: 45 times
- Been thanked: 73 times
Re: 1980 Viper Rebirth
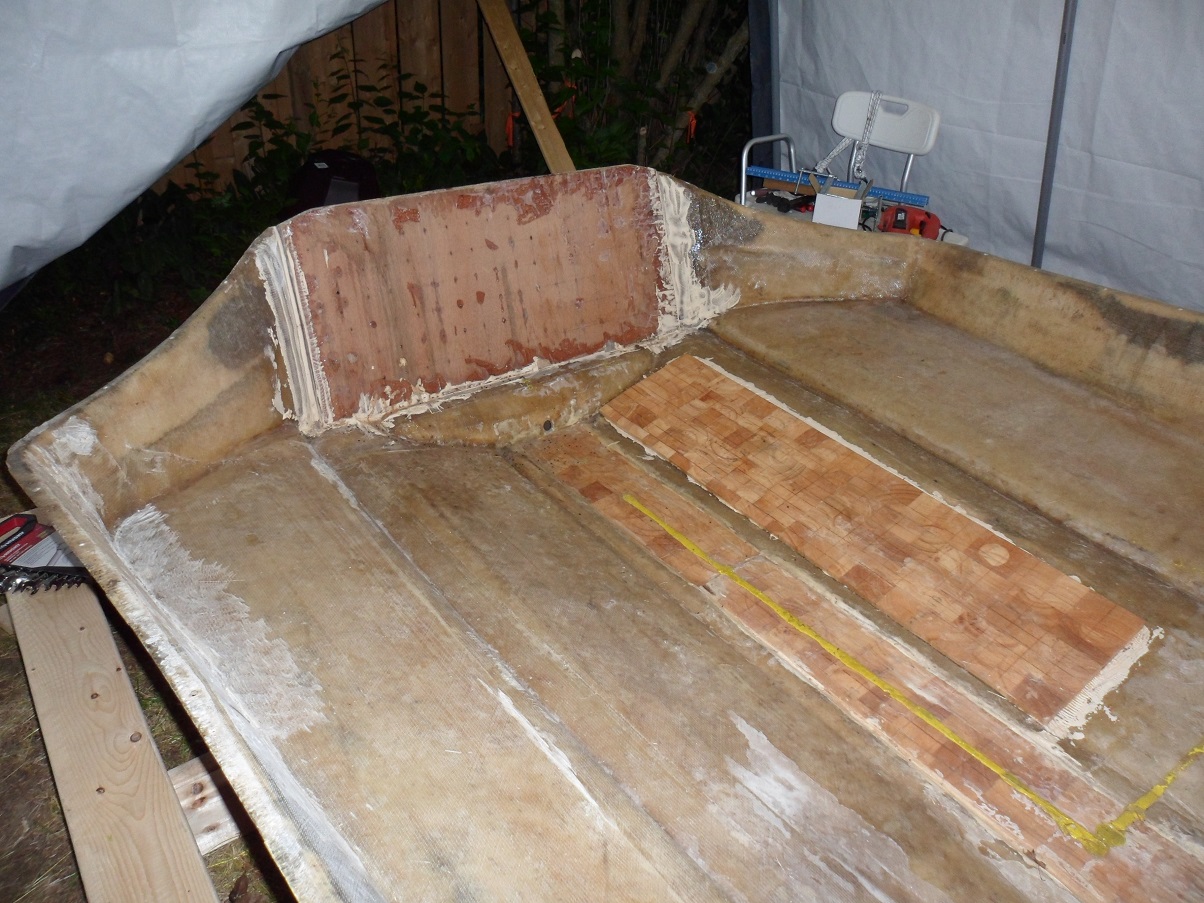
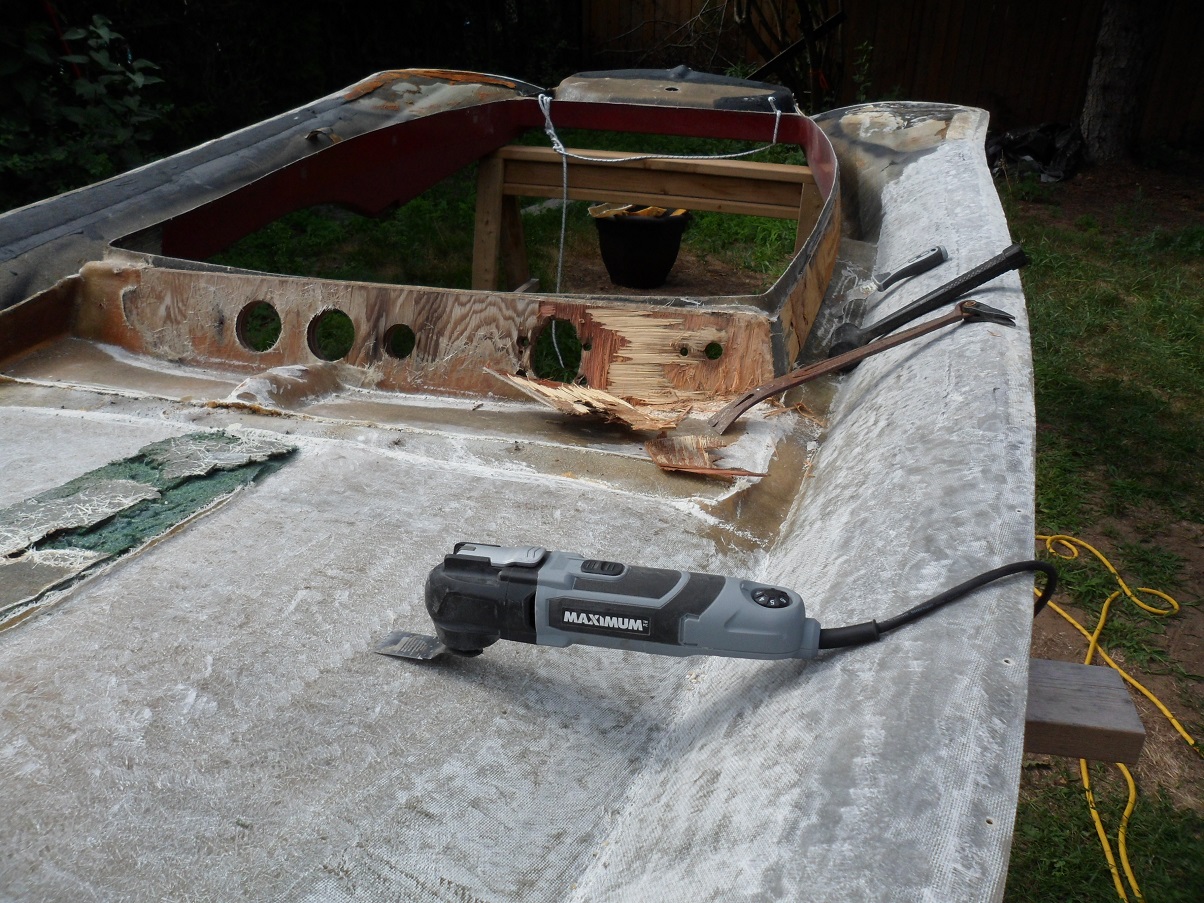
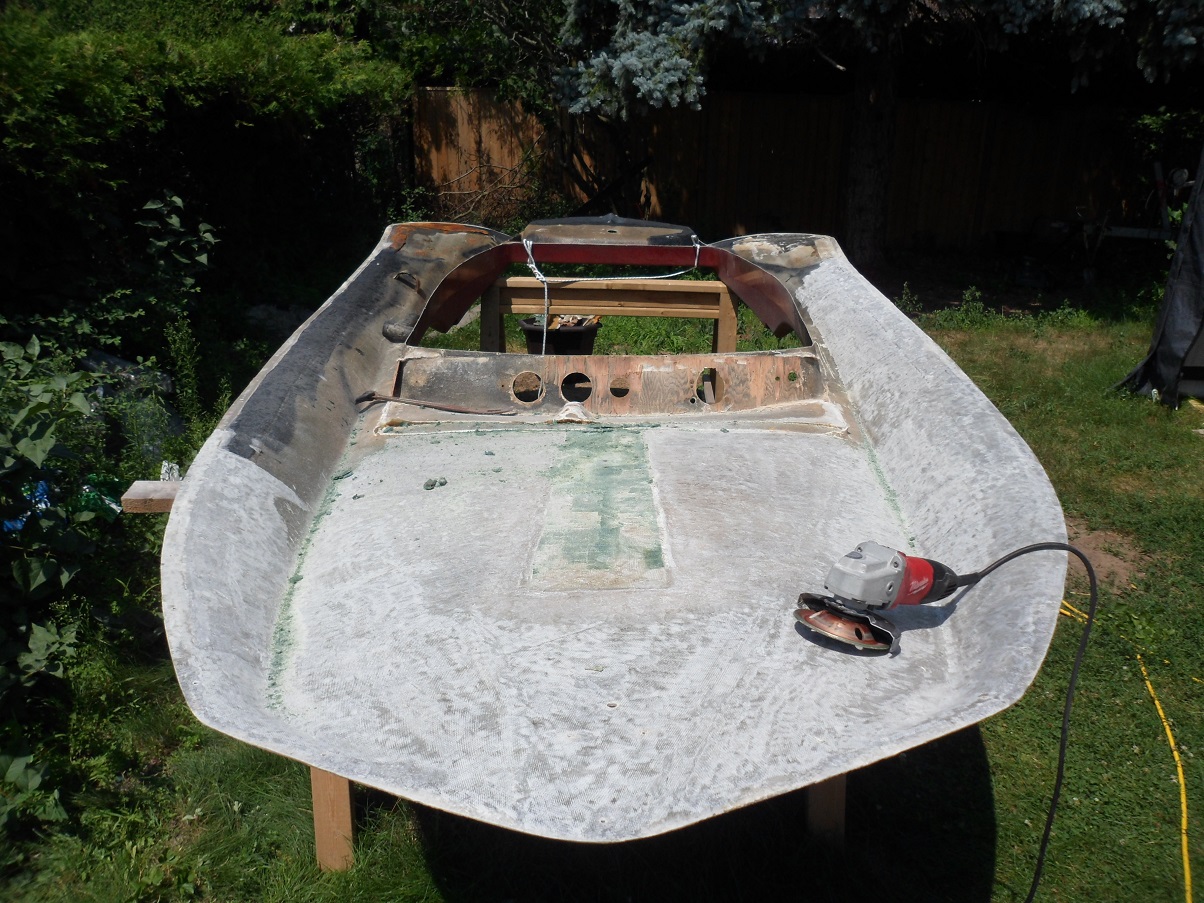
Deck Underside Deconstruction - Part 1
I haven't had a chance to buy more 1.5oz CSM, so I haven't been able to continue bagging the core in the hull.
I decided in the meantime to work on the underside of the deck.
The wood structure in it is in pretty bad shape, so tearing it all out and replacing it is the only logical option.
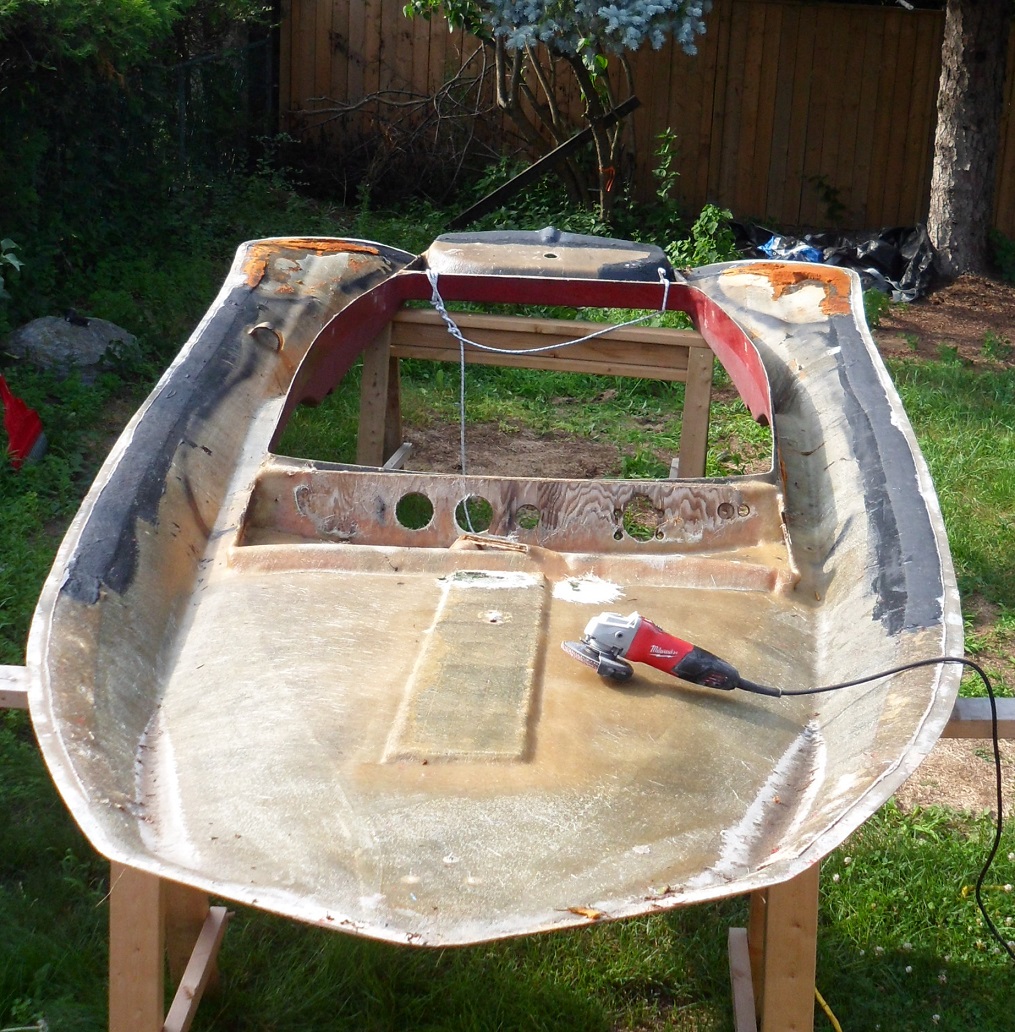
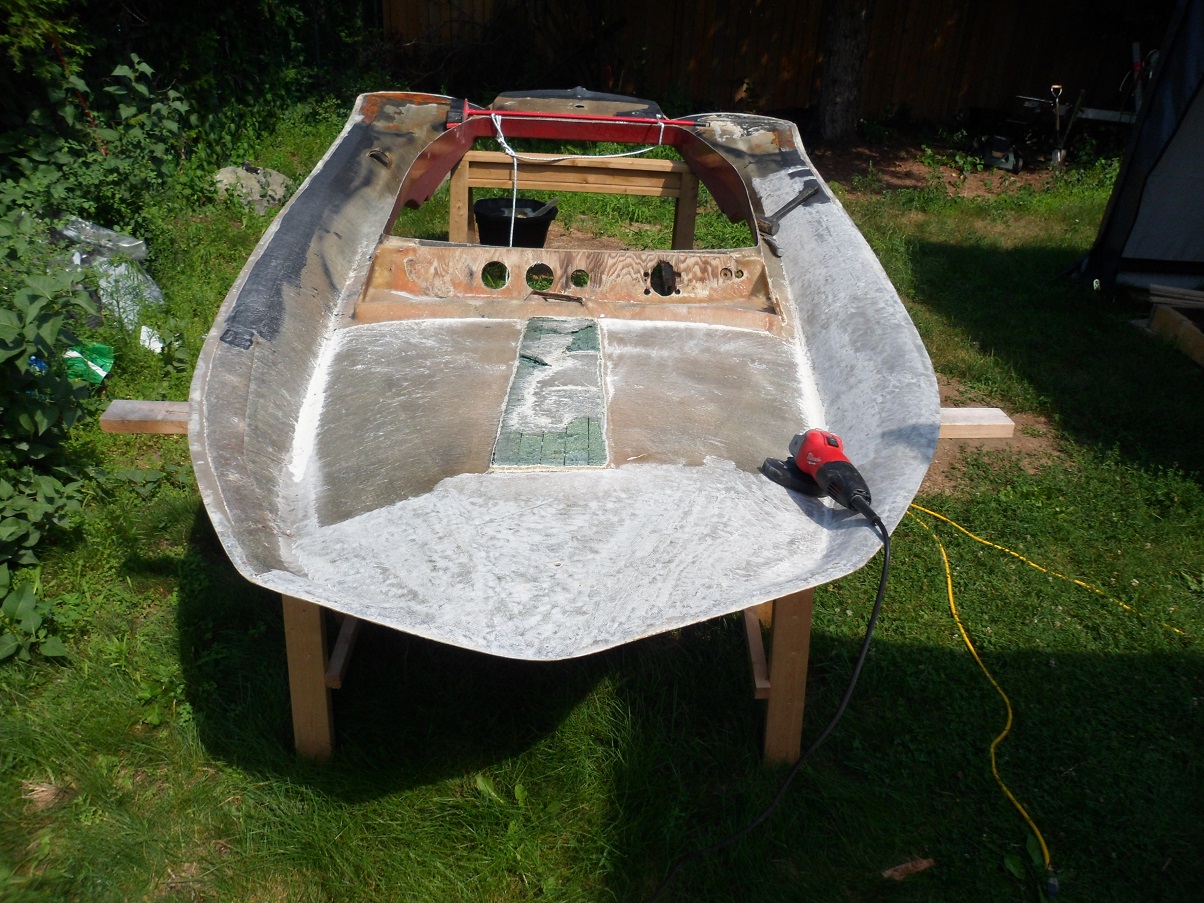
Started grinding with a 40-grit flap disc, but switched it back to my 36-grit brazed cup wheel.
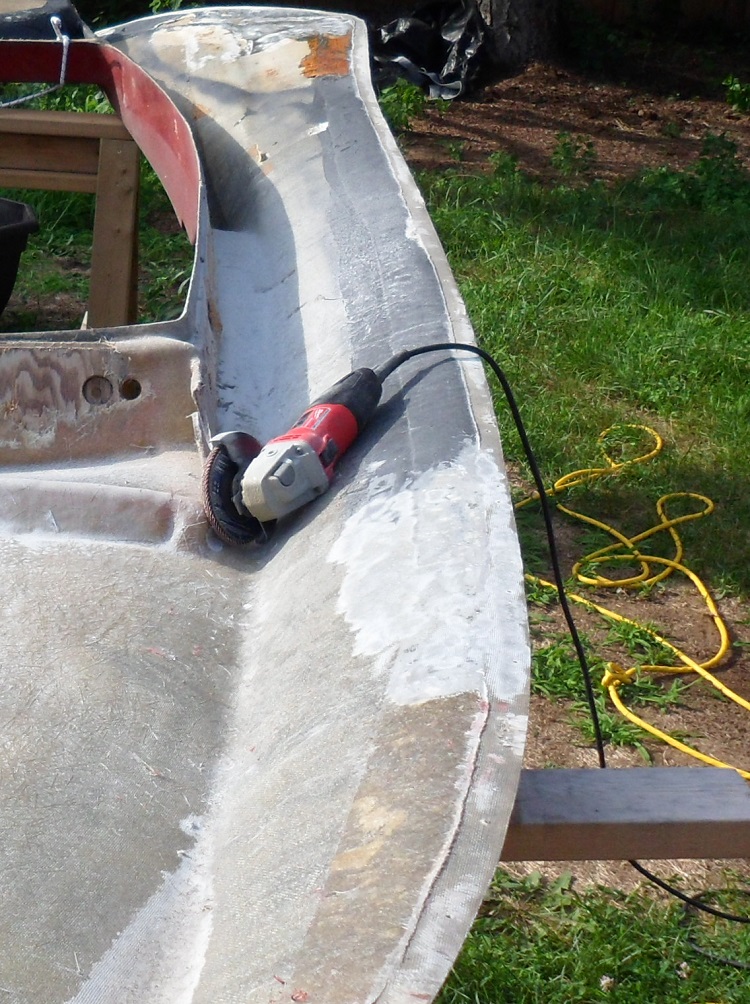
Ah, you know what? Lemme deal with this weird thing in the middle instead.

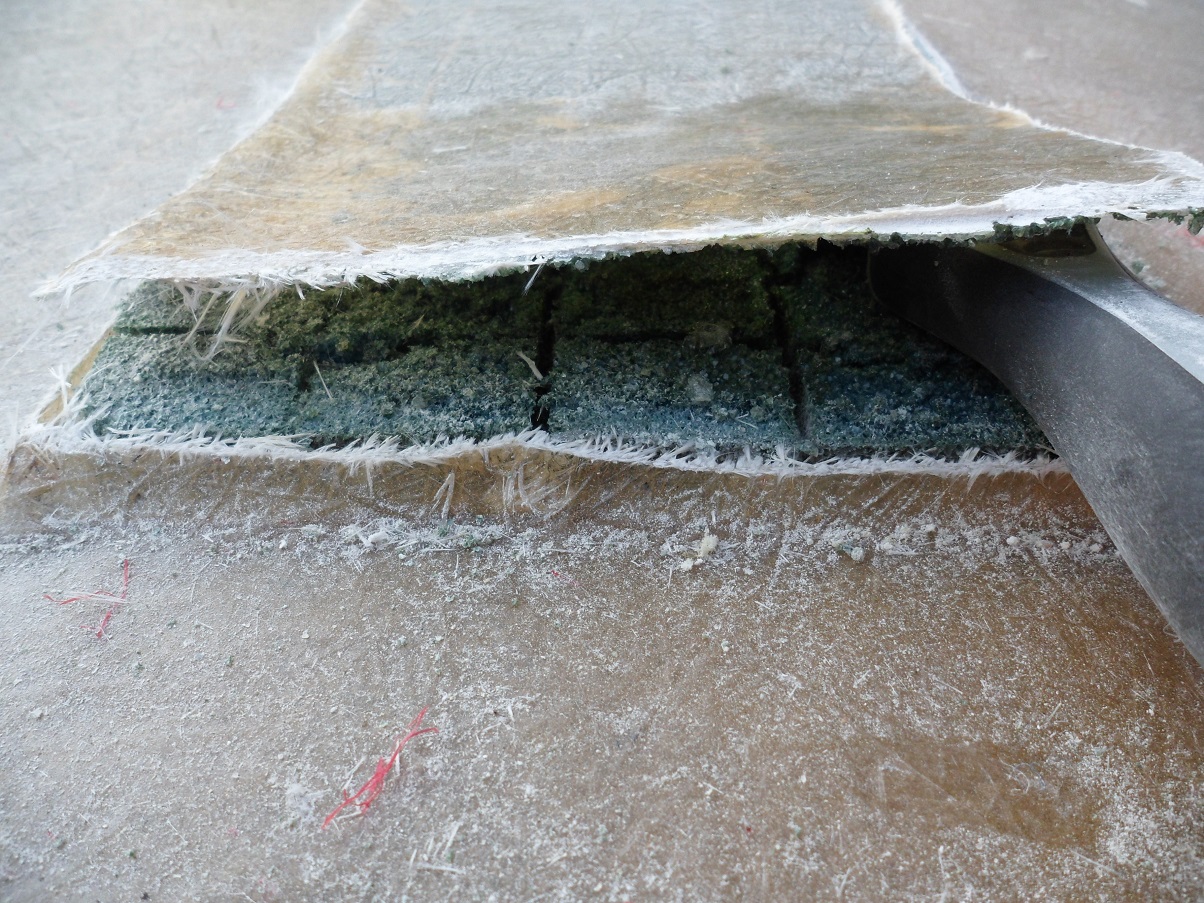
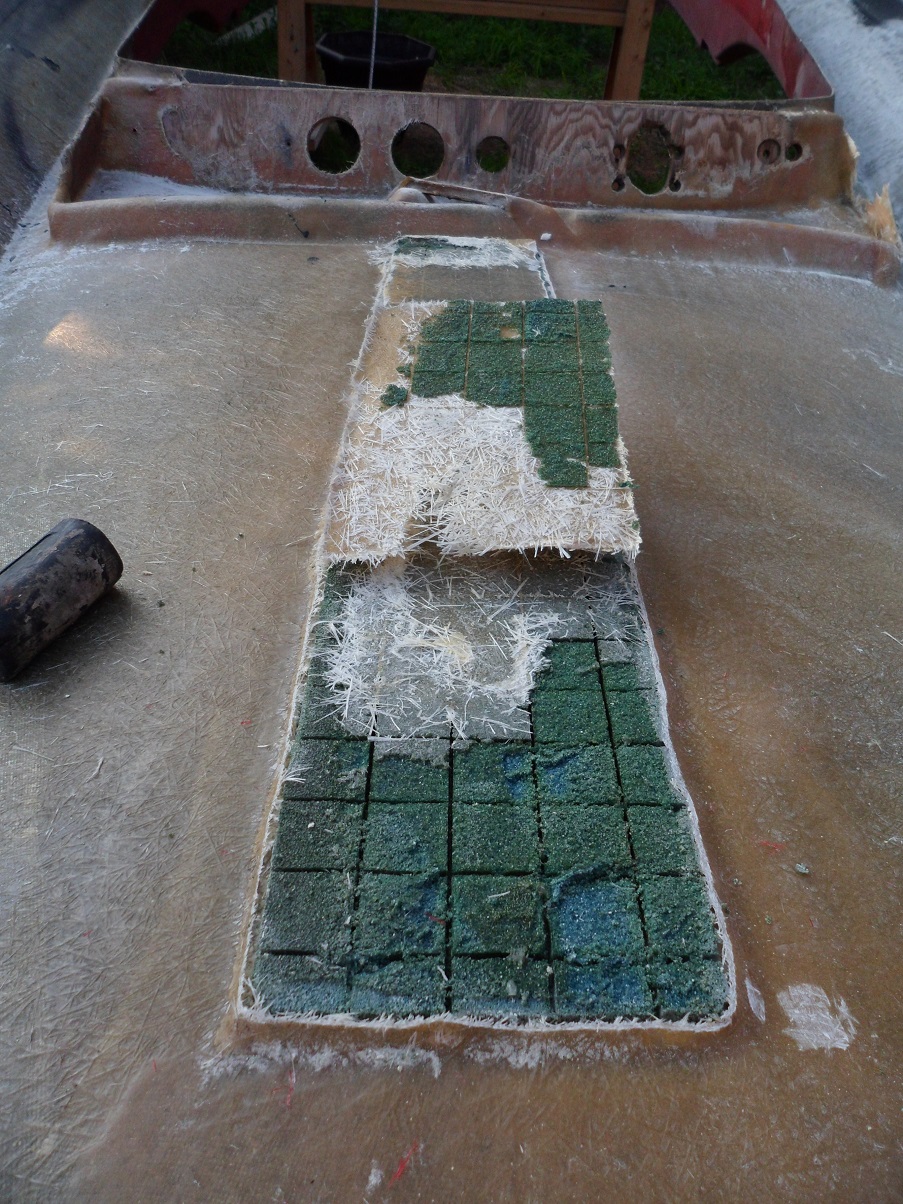
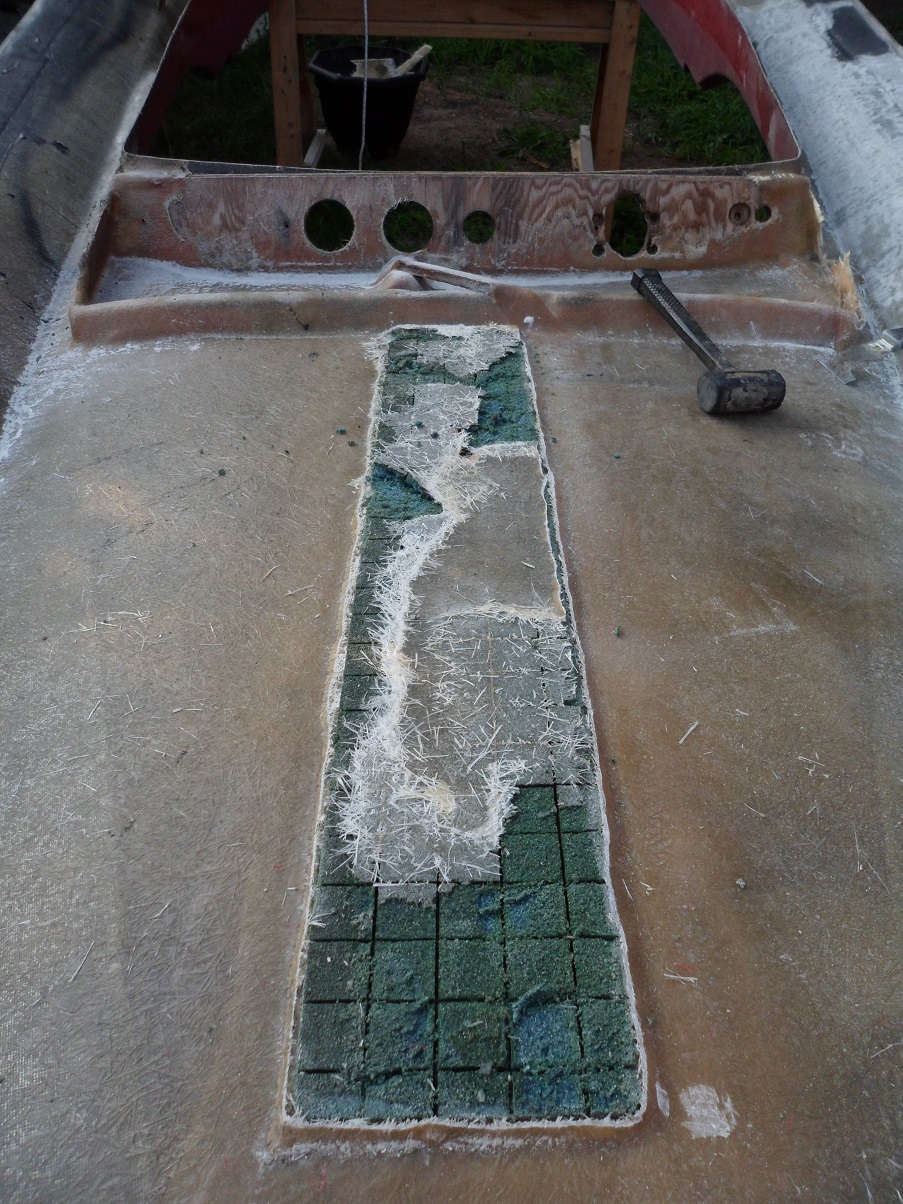
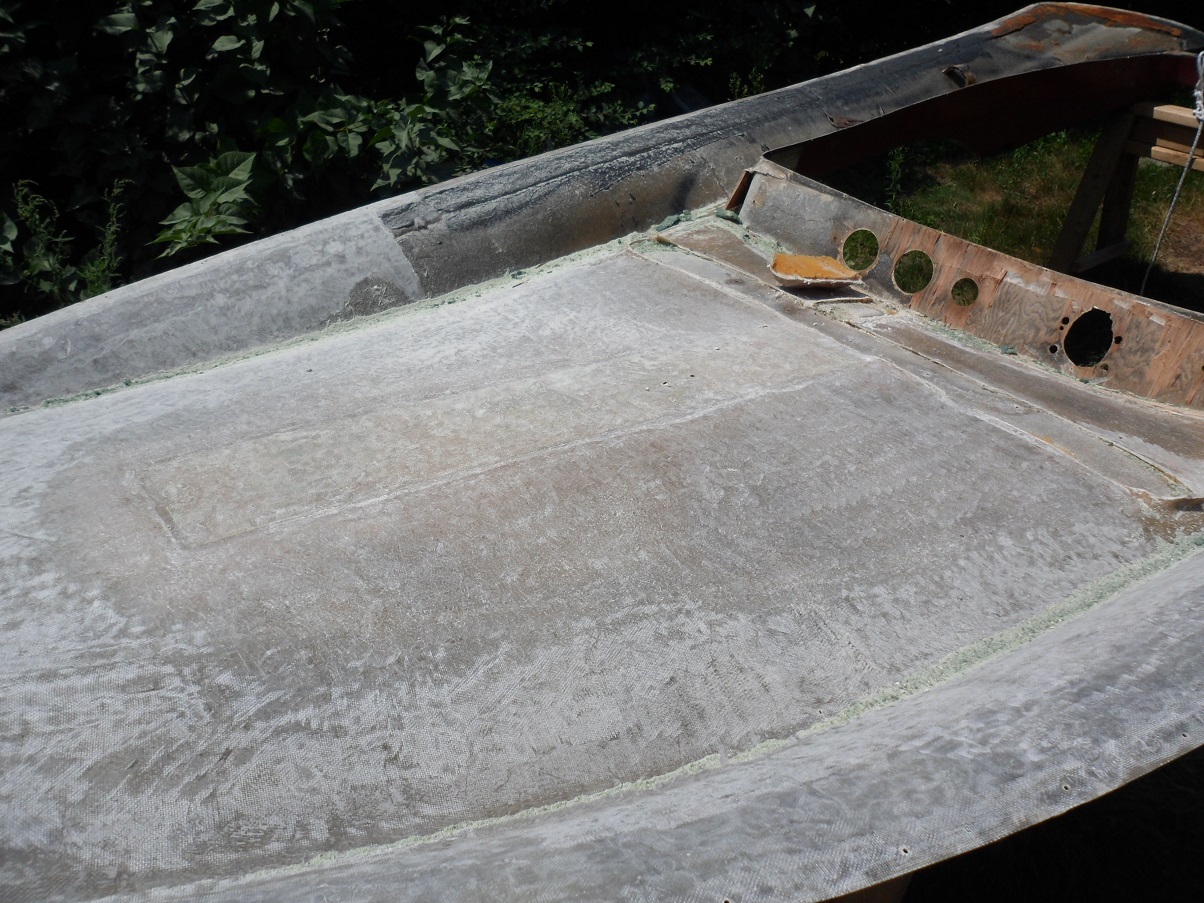
At this point, I just started alternating between grinding, and whatever this green shite is. I still don't know what you'd call it.
It has the same texture, and crumbles very easily, like a 30-year old pool noodle.
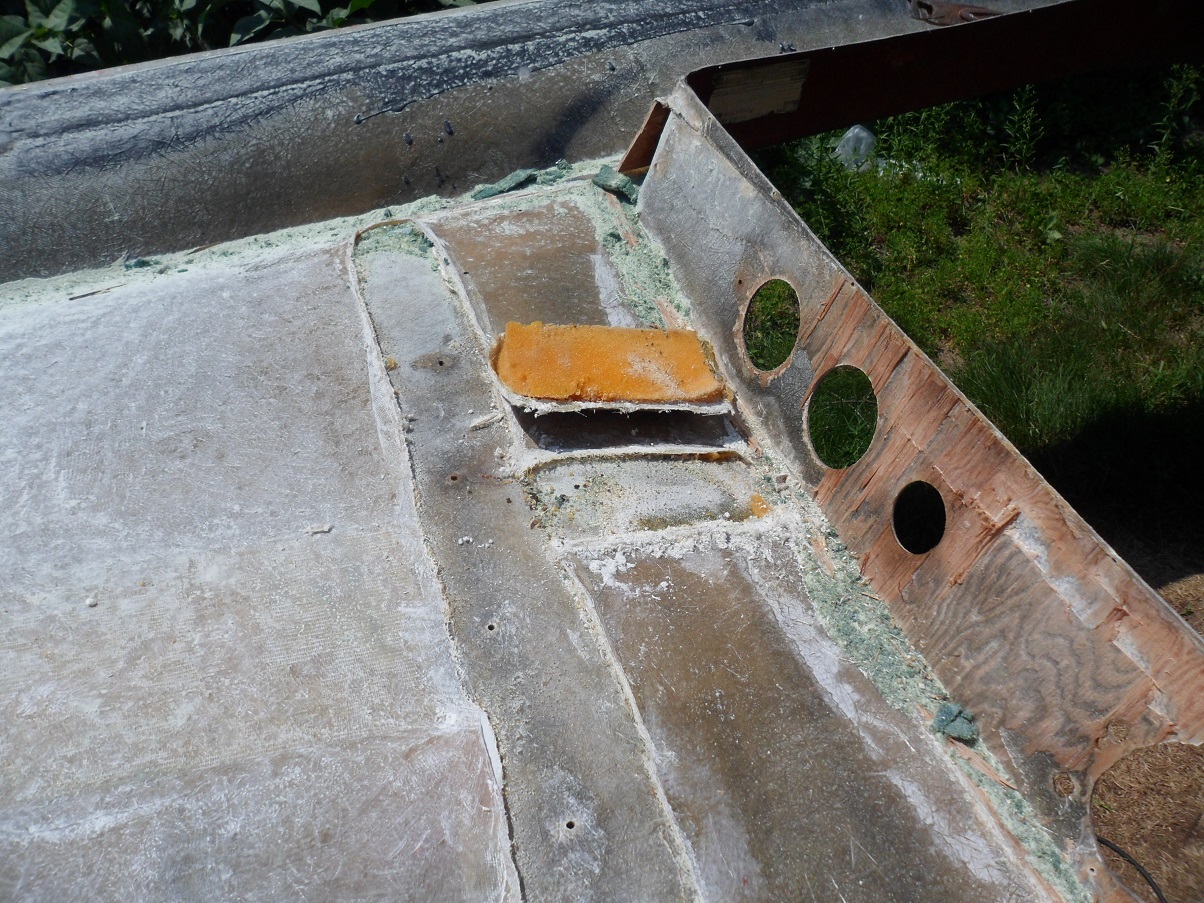
Cut off the triangular lateral brace - inside was this soft foam, like you'd find in a cheap seat cushion...
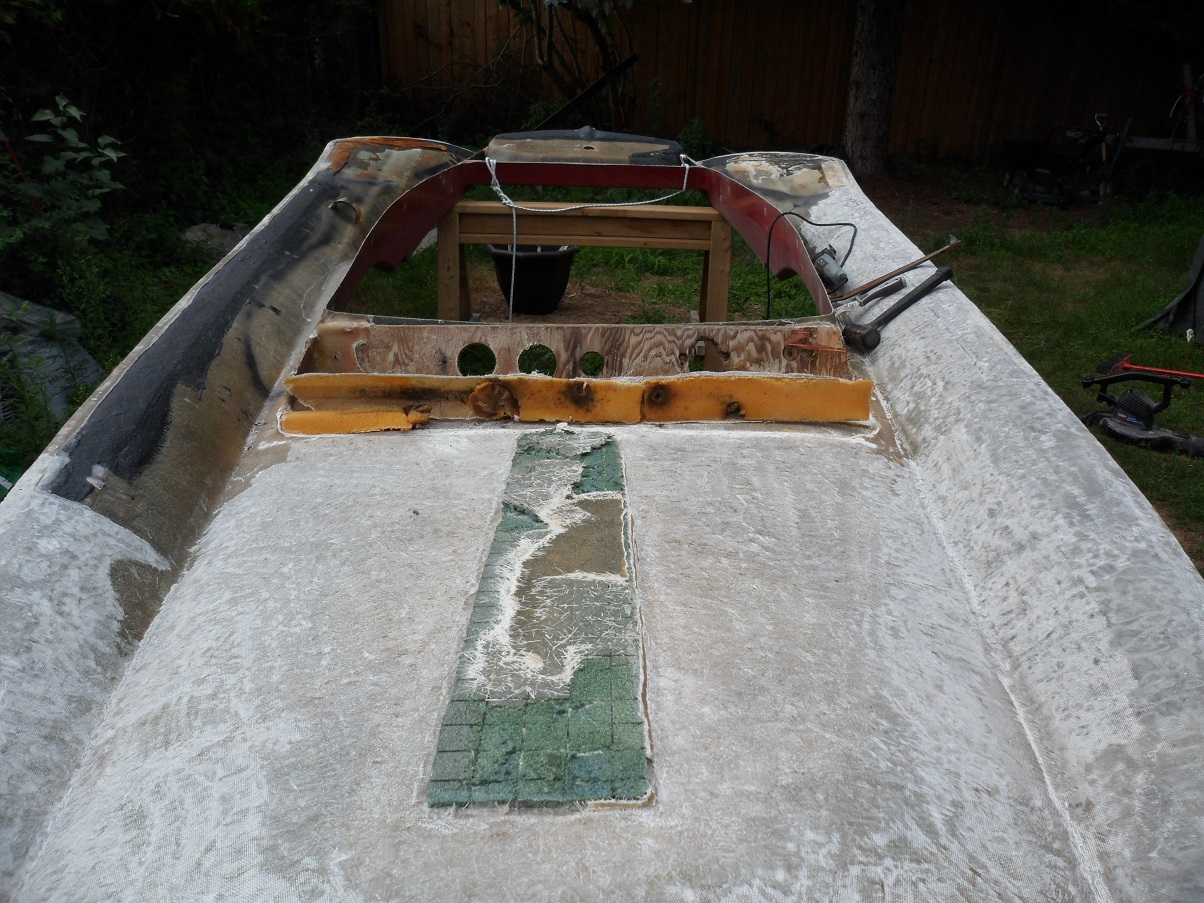
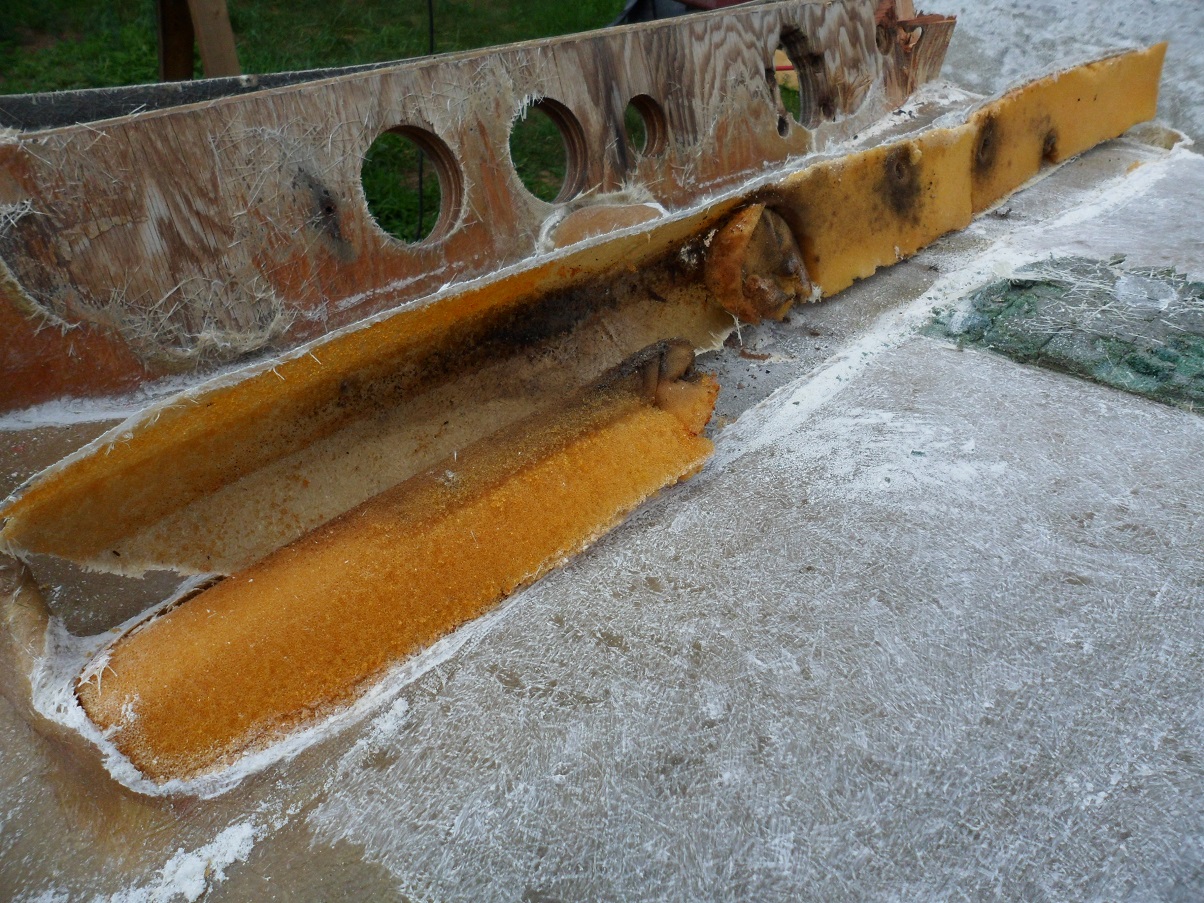
Dash removal begins...
Removal of the flimsy 1/4" plywood...
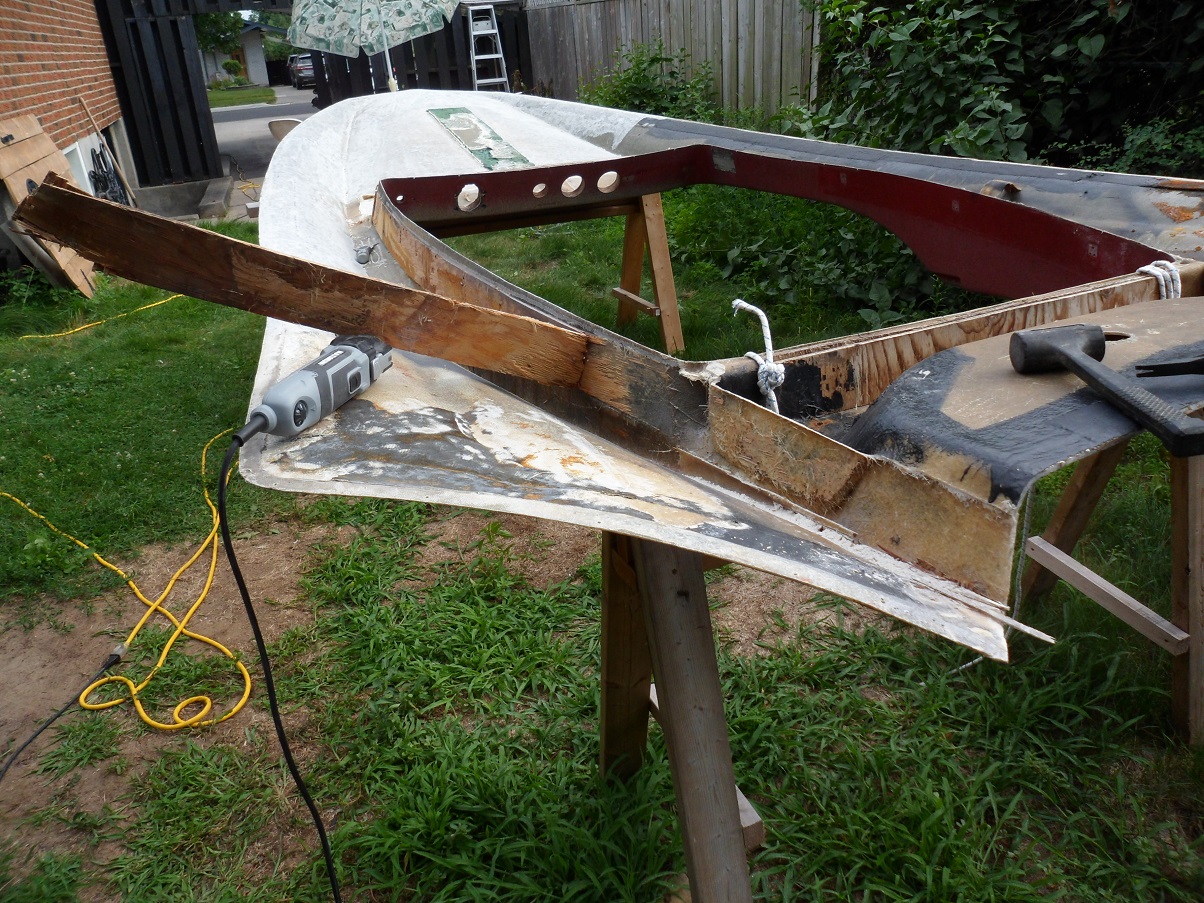
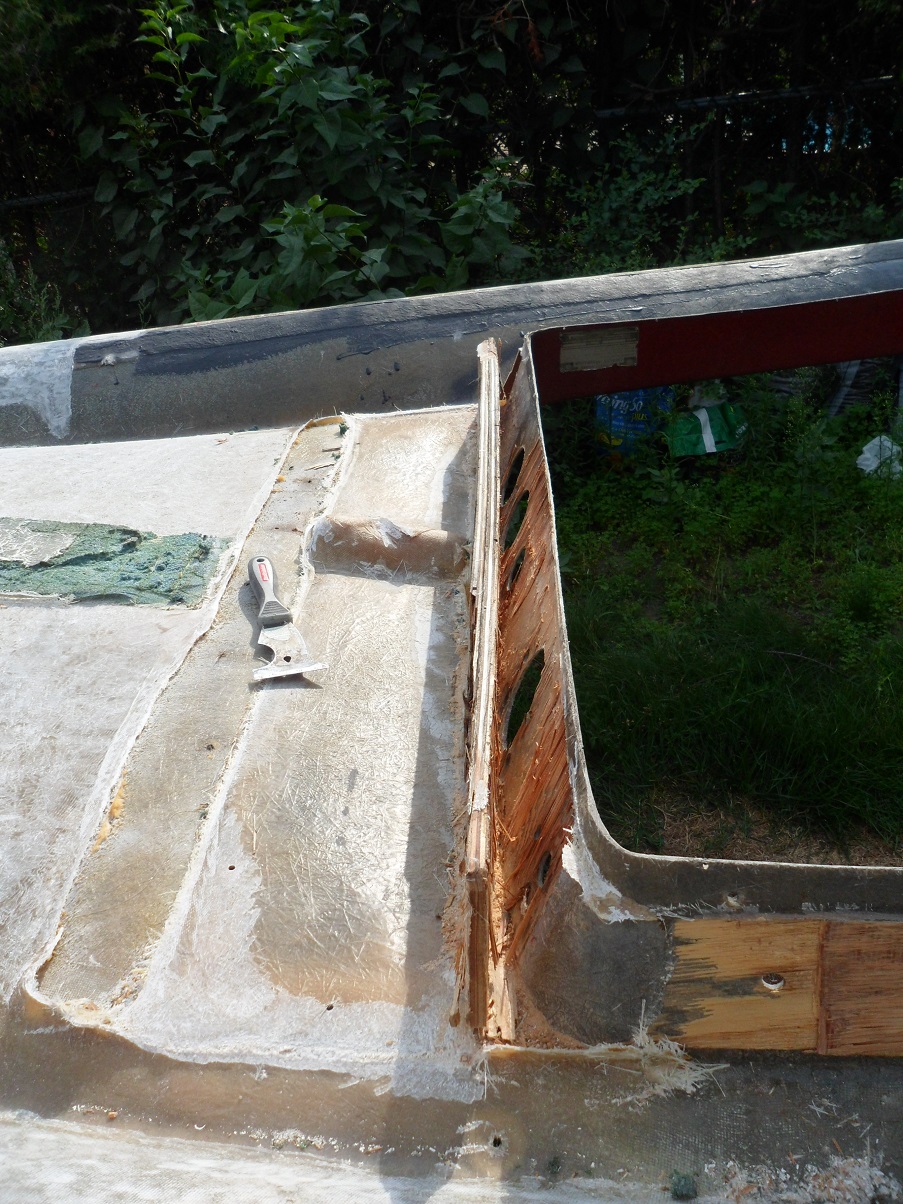
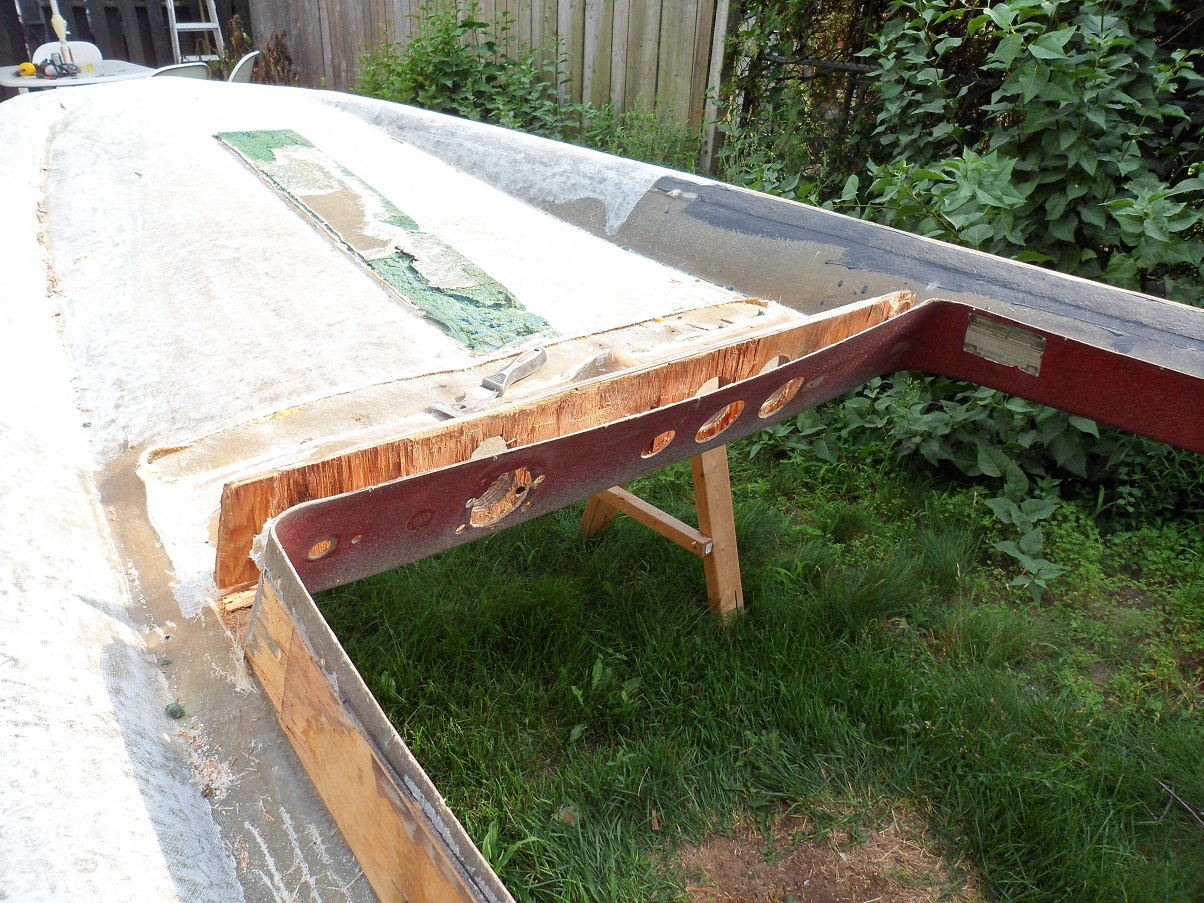
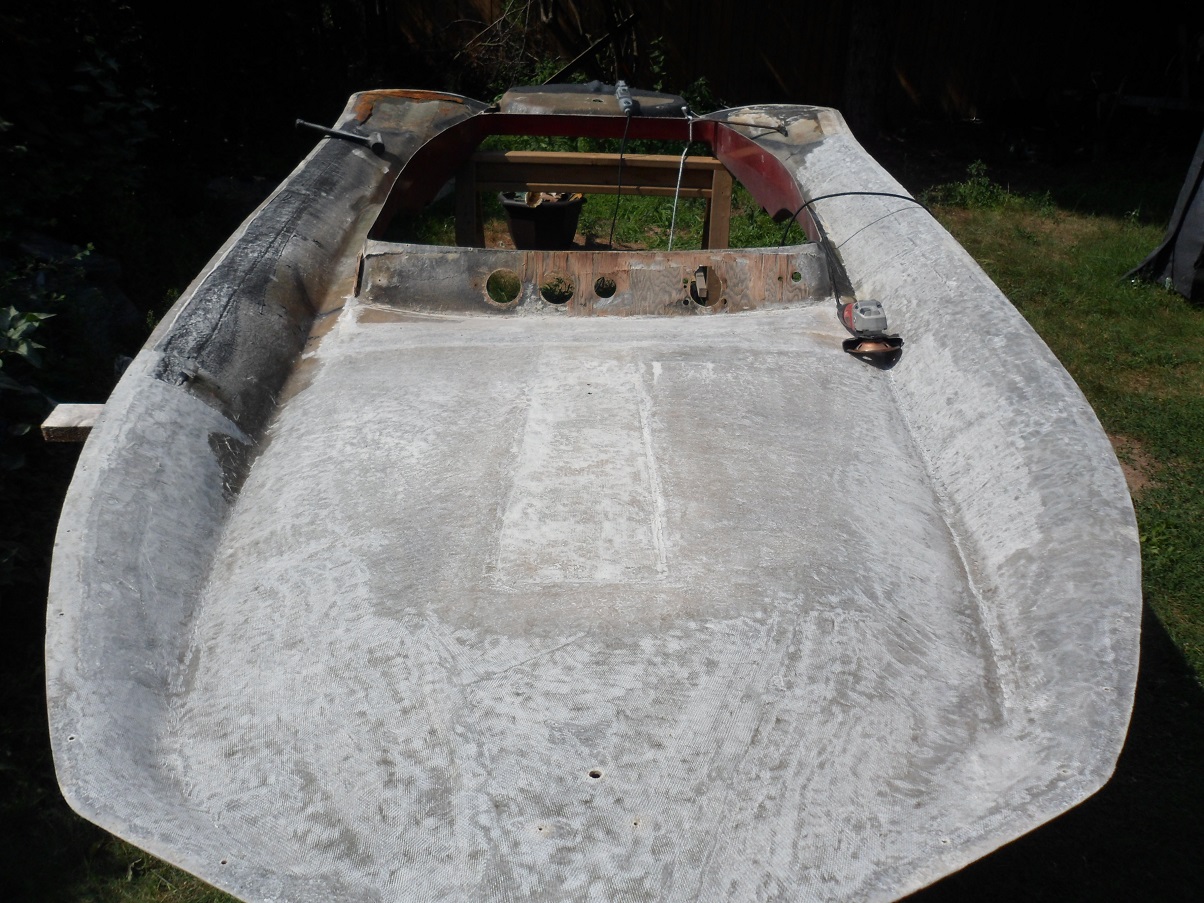
My goal this weekend is to have the entire underside of the deck stripped of wood, and ground/prepped for 1708.
I haven't had a chance to buy more 1.5oz CSM, so I haven't been able to continue bagging the core in the hull.
I decided in the meantime to work on the underside of the deck.
The wood structure in it is in pretty bad shape, so tearing it all out and replacing it is the only logical option.
Started grinding with a 40-grit flap disc, but switched it back to my 36-grit brazed cup wheel.
Ah, you know what? Lemme deal with this weird thing in the middle instead.
At this point, I just started alternating between grinding, and whatever this green shite is. I still don't know what you'd call it.
It has the same texture, and crumbles very easily, like a 30-year old pool noodle.
Cut off the triangular lateral brace - inside was this soft foam, like you'd find in a cheap seat cushion...
Dash removal begins...
Removal of the flimsy 1/4" plywood...
My goal this weekend is to have the entire underside of the deck stripped of wood, and ground/prepped for 1708.
-
 proprider
- Regular

- Posts: 187
- Joined: Aug 15, 2012 9:18 pm
- Location: Deerfield, Mi
- Been thanked: 12 times
Re: 1980 Viper Rebirth
- DSCF4423%20(Copy)[1].JPG (88.76 KiB) Viewed 12569 times
- DSCF4422%20(Copy)[1].JPG (6.3 KiB) Viewed 12569 times
- DSCF4418%20(Copy)[1].JPG (118.43 KiB) Viewed 12569 times
- DSCF4415%20(Copy)[1].JPG (6.39 KiB) Viewed 12569 times
-
AdamDK
- Moderator
- Posts: 327
- Joined: Jul 19, 2016 6:58 pm
- Location: Oshawa, Ontario (near Toronto)
- Has thanked: 45 times
- Been thanked: 73 times
Re: 1980 Viper Rebirth
Thanks Joe. Yours and Ron Pratts rebuilds are huge influencers in my build.
I actually bought a few packages of various sized rigid plastic "C" straps - the ones used for electrical conduits. Gonna 5200 those on when the underside is rebuilt.
[ Post made via Android ]
I actually bought a few packages of various sized rigid plastic "C" straps - the ones used for electrical conduits. Gonna 5200 those on when the underside is rebuilt.
[ Post made via Android ]
- Attachments
-
- 37675058_L.jpg (60.41 KiB) Viewed 12567 times
-
- Random Topics
- Replies
- Views
- Last post
-
- 1Replies
- 91883 Views
- Last post by Calhydro
Sep 15, 2018 6:58 pm
-
- 5Replies
- 259407 Views
- Last post by alaskastreamin
Oct 22, 2018 1:21 pm
-
- 1Replies
- 196880 Views
- Last post by blacknsilvr
Oct 20, 2018 9:47 pm
-
- 4Replies
- 231650 Views
- Last post by Hippie459MN
Nov 08, 2018 10:15 am
-
- 2Replies
- 193449 Views
- Last post by Hippie459MN
Nov 08, 2018 10:16 am