Welcome to HydrostreamForums.com
If you're not registered, please consider doing so. It's easy - just click the "Register" link at the top
right corner of the page. Our forum needs members like you to contribute to the site in order to survive.
We are a community of boat lovers and Hydrostream enthusiasts here; we are happy to help anyone
who may need advice or guidance for their 'Stream; and we encourage members to offer their advice
and guidance to others as well. Thank you for visiting our forums, and please register.
We're better than Facebook.

Registering only takes a few minutes and you can do so by CLICKING HERE

If you are a member, don't forget to log in to take full advantage of the forum.

1977 Vulture Rebuild

Restoring your Hydrostream or just giving it a small makeover? What better place than to show off your project. Big or small.
Locked
User avatar

Topic Author
Hippie459MN
Site Admin
Site Admin
Posts: 4002
Joined: Mar 25, 2009 7:31 pm
Location: Nowthen, MN
Has thanked: 364 times
Been thanked: 86 times
Contact:

Re: 1977 Vulture Rebuild

Post: # 4103Post Hippie459MN »

Flame retardant foam anyone? The handle of the hammer was the back of the seat box and where the repair ended. I didn't know there was what looks to be foam core up there. Anyone else have this? It was glassed over and it looked factory.

Image

I will grab a picture of the other side before I rip it out.

[ Post made via Mobile Device ] Image
-Kevin
Project Vulture | Project Vector | Project Vamp | Project Vixen
The Vulture Wish List | Project CobraJet

1977 HydroStream Vulture - Worlds longest ongoing project. :eek:
1982 Hydrostream Vector
1982 Hydrostream Vamp
1973 Hydrostream Vixen
1976 CobraJet Jet Boat - Outboard conversion project
1976 Pontoon - aka The Family Truckster
User avatar

VultureNo2
Hydrostream know it all
Posts: 997
Joined: Nov 20, 2009 11:35 pm
Location: Pleasant Prairie, WI
Been thanked: 2 times

Re: 1977 Vulture Rebuild

Post: # 4105Post VultureNo2 »

Yes - It all came out and it's not going back in. I had the foam in tac and cut it with a blade from a pipe saw and pulled the whole chunk out at one time, but there was still balsa core uder that too and it was mostly in tac and a real _ _ _ _ _ to get out. The looser the stuff is the easier it comes out. Keep going. Looks grreat. Bill :up:
User avatar

VultureNo2
Hydrostream know it all
Posts: 997
Joined: Nov 20, 2009 11:35 pm
Location: Pleasant Prairie, WI
Been thanked: 2 times

Re: 1977 Vulture Rebuild

Post: # 4106Post VultureNo2 »

Is that a glassed in platform for a battery by your feet in the front? Also, that cross support is an emtry piece of glass they call an airbox (I think). I removed that and will make a wooden bulkhead there. Bill
User avatar

Topic Author
Hippie459MN
Site Admin
Site Admin
Posts: 4002
Joined: Mar 25, 2009 7:31 pm
Location: Nowthen, MN
Has thanked: 364 times
Been thanked: 86 times
Contact:

Re: 1977 Vulture Rebuild

Post: # 4107Post Hippie459MN »

Time to bore you with a lot of pictures and some story to go along with them. I am amazed at how awful this was put back together at one time. There was not a single dry piece of wood in there so far and when that plywood core was not even close to dry, it doesn't stay together when pulling it up so well so I will be doing some grinding it out where it did manage to have a decent bond to the hull.

Just click on any of the picture to enlarge them. :up:

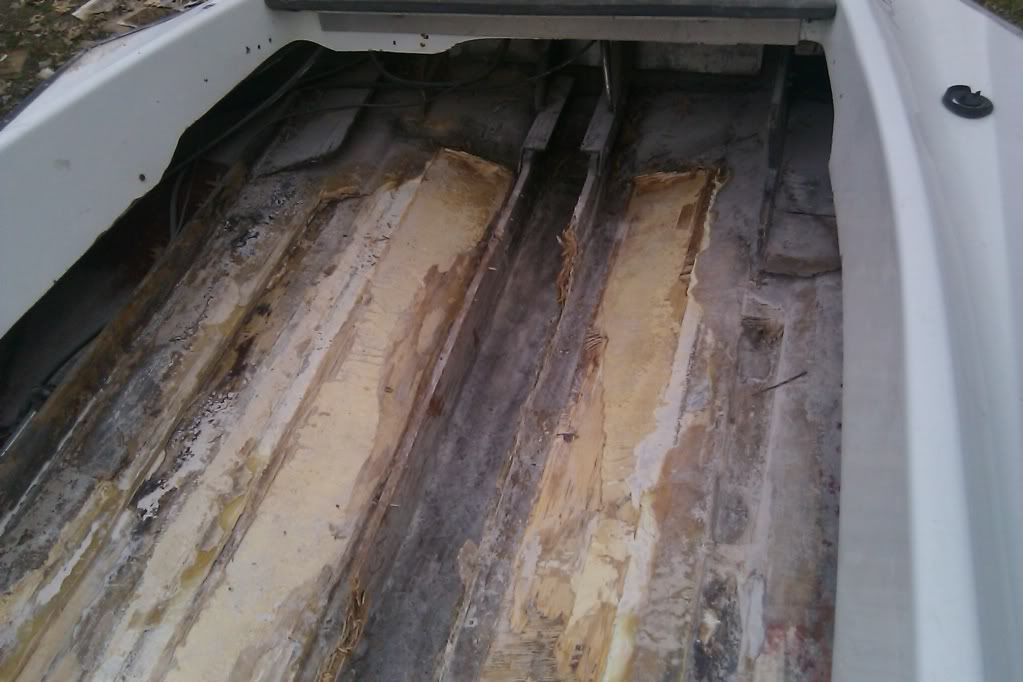
here is the other side that has the covered foam.

Image

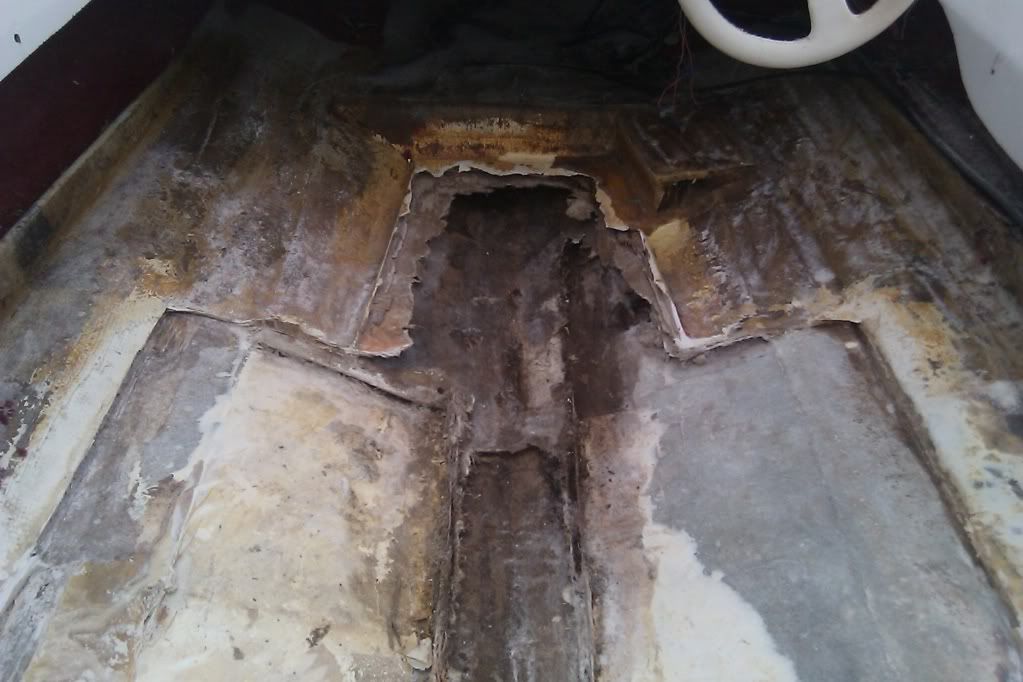
Here is some nice wet wood up by the bulkhead. There was a single stringer from the front of the seat box to the bulkhead that was mud and barely glassed in. I am going to redo that and run the 2 stringers all the way up to the bulkhead then run the floor all the way up and to the bulkhead and mount my seats right to the floor on these super low profile locking swivel mounts I picked up super cheap from a friend. Here they are. I only paid $20 for the pair and they have never been used - Swivel seat mounts

Image

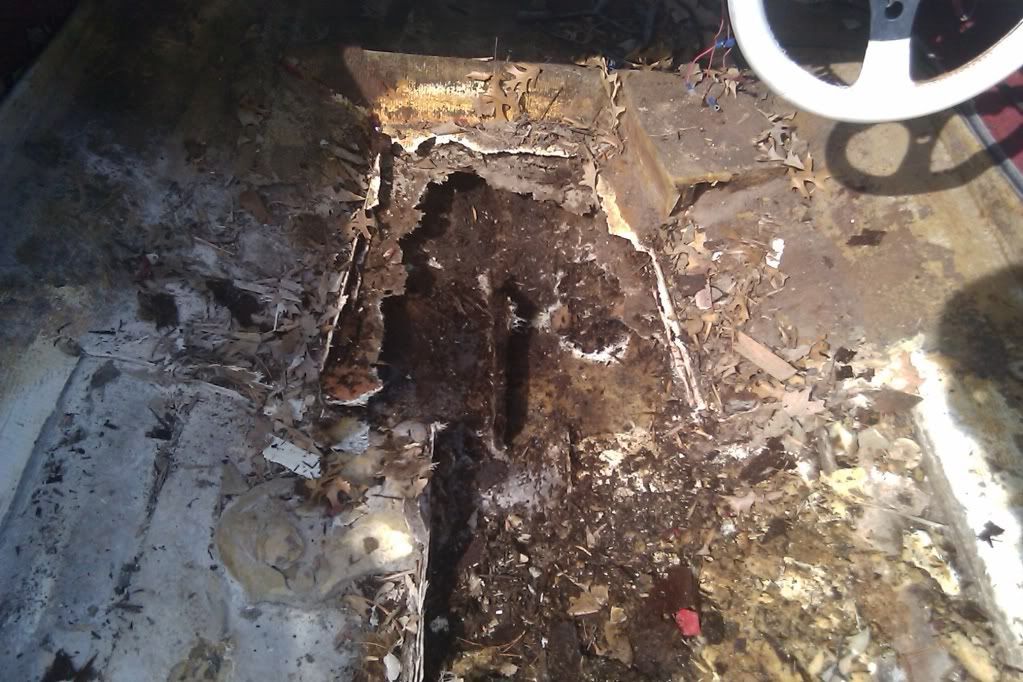
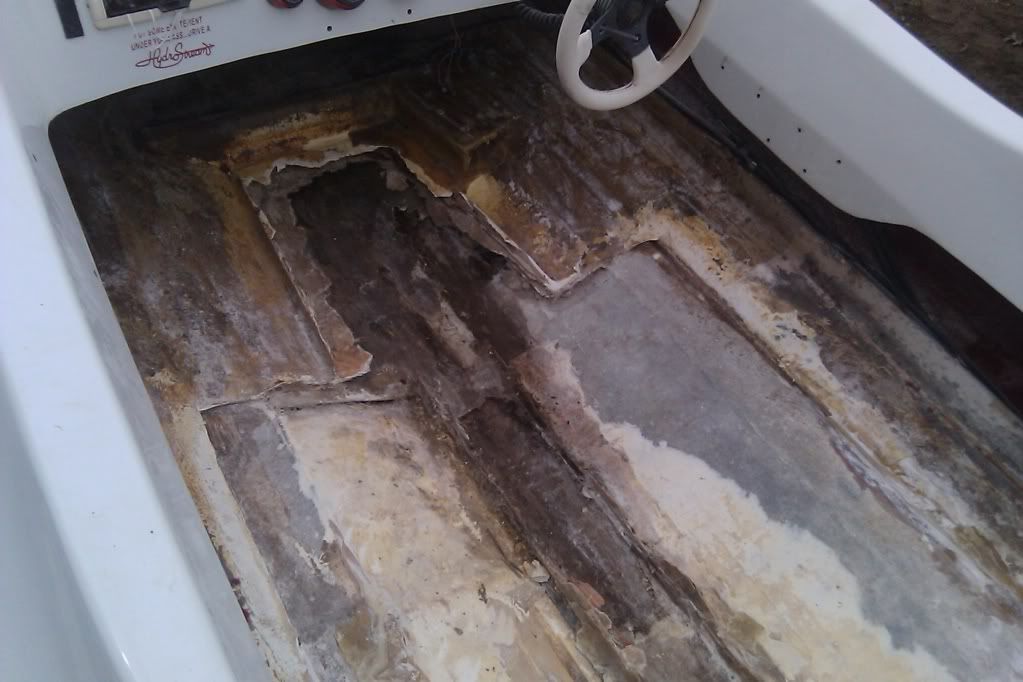
Here is what I got done today. Got both of the plywood core sections out for the most part. The one on the port side was super wet and was actually somewhat bonded to the hull so it didn't come up in one piece so some extra grinding will be in order for sure. The other side was soaking wet but was barley bonded to the hull so it just about came up in one piece. We just had to grind away at what seemed like 3 inch thick resin on the edges of the plywood.

Image

Image

Image

Some of the wonderful wet wood I found. At least it just comes right out with no work what so ever. I am going to eliminate that goofy area that looks like it would have been an air box or something just behind the bulkhead and run the stringers all the way up. In a way eliminating the actual seat box and just attach them to the floor really. The gray area is where I ground down all the epoxy and crap and that little section took me about an hour and that was the easy spot that wasn't so built up with crap. LoL

Image

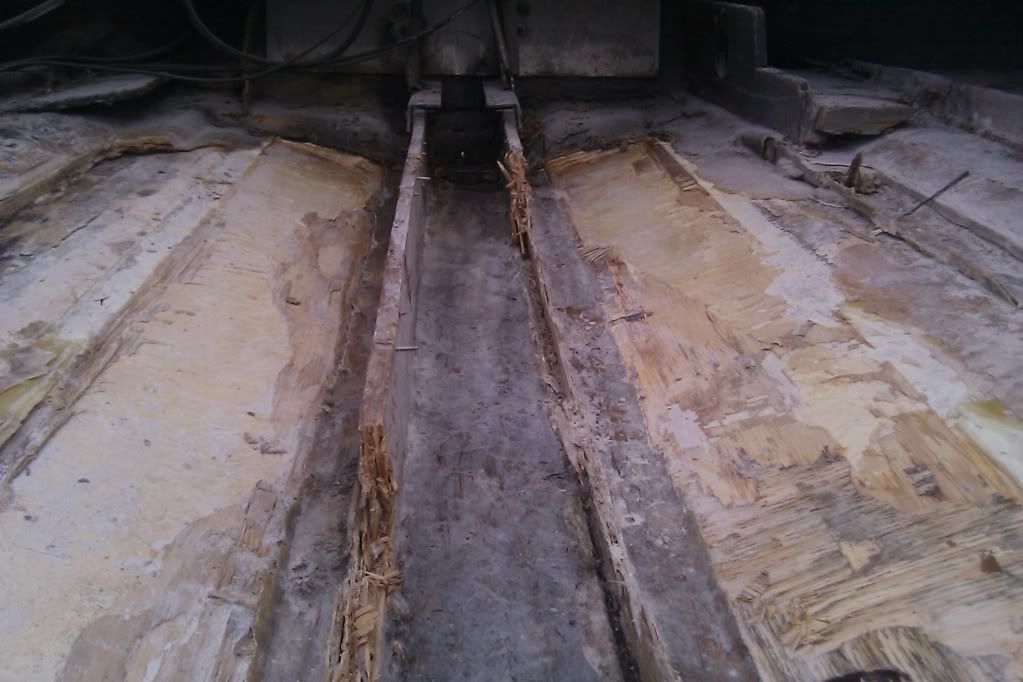
And as you can see down the pad area they never repaired it anywhere. They just left the wet wood in there and poured some resin over the existing fiberglass that was over the core. You can see the wet wood at the bottom of the picture then above that is glass then the dark area at the top is the epoxy that is over the glass. I'm am still trying to decide if I am just going to go extra think on the glass there or put core back in in the pad area.

Image

Here are just a few more pictures I snapped at the end of the day today. I feel like we got a lot done in the 4 hours we worked on it considering how them plywood core sections were in there. It was harder getting the resin crap broke to get the plywood up and out of there then actually taking it out.

Image

Image

Image

I haven't done anything up here yet but its next. I have to chase down a small fan I don't have to worry about to put up there when I start grinding up there. :)

Image

Enjoy the pictures!! :up: Hope there not to boring as I am trying to take plenty along the way for everyone to see plus my own records so I can look back at them a few years from now and smile and know I have a great boat!
Last edited by Hippie459MN on Dec 30, 2012 5:53 am, edited 2 times in total.
Reason: Cause my spelling and grammer stink today.
-Kevin
Project Vulture | Project Vector | Project Vamp | Project Vixen
The Vulture Wish List | Project CobraJet

1977 HydroStream Vulture - Worlds longest ongoing project. :eek:
1982 Hydrostream Vector
1982 Hydrostream Vamp
1973 Hydrostream Vixen
1976 CobraJet Jet Boat - Outboard conversion project
1976 Pontoon - aka The Family Truckster
User avatar

VultureNo2
Hydrostream know it all
Posts: 997
Joined: Nov 20, 2009 11:35 pm
Location: Pleasant Prairie, WI
Been thanked: 2 times

Re: 1977 Vulture Rebuild

Post: # 4108Post VultureNo2 »

Looks great Hippie, keep up the good work. Bill
User avatar

Topic Author
Hippie459MN
Site Admin
Site Admin
Posts: 4002
Joined: Mar 25, 2009 7:31 pm
Location: Nowthen, MN
Has thanked: 364 times
Been thanked: 86 times
Contact:

Re: 1977 Vulture Rebuild

Post: # 4109Post Hippie459MN »

It doesn't look like much in the picture but there is a good amount of stuff there from today.

Image

:up:

[ Post made via Mobile Device ] Image
-Kevin
Project Vulture | Project Vector | Project Vamp | Project Vixen
The Vulture Wish List | Project CobraJet

1977 HydroStream Vulture - Worlds longest ongoing project. :eek:
1982 Hydrostream Vector
1982 Hydrostream Vamp
1973 Hydrostream Vixen
1976 CobraJet Jet Boat - Outboard conversion project
1976 Pontoon - aka The Family Truckster
User avatar

77viper
HSF Supporting Vendor
Posts: 1989
Joined: Mar 29, 2009 11:38 pm
Location: montgomery MN

Re: 1977 Vulture Rebuild

Post: # 4112Post 77viper »

Looks like your making good progress.

Do you know if the repairs were done in epoxy?
Samari on s&f
Chet Olson

75 viper 2.4 200, 130 shot of NOS
91 vegas loaned out
79 vking project 2.5 280
User avatar

Topic Author
Hippie459MN
Site Admin
Site Admin
Posts: 4002
Joined: Mar 25, 2009 7:31 pm
Location: Nowthen, MN
Has thanked: 364 times
Been thanked: 86 times
Contact:

Re: 1977 Vulture Rebuild

Post: # 4113Post Hippie459MN »

Im guessing that what it is. Look at that yellow/brownish junk. It was so thick and had zero glass in it what so ever.

Image
Click the image to enlarge it

I will get a better picture of some later so you can see. It was some rock hard stuff that they were now shy about using what so ever. LoL And look how thick it is. Has to be a good inch. :(
-Kevin
Project Vulture | Project Vector | Project Vamp | Project Vixen
The Vulture Wish List | Project CobraJet

1977 HydroStream Vulture - Worlds longest ongoing project. :eek:
1982 Hydrostream Vector
1982 Hydrostream Vamp
1973 Hydrostream Vixen
1976 CobraJet Jet Boat - Outboard conversion project
1976 Pontoon - aka The Family Truckster
User avatar

77viper
HSF Supporting Vendor
Posts: 1989
Joined: Mar 29, 2009 11:38 pm
Location: montgomery MN

Re: 1977 Vulture Rebuild

Post: # 4115Post 77viper »

Ok so I have a dumb question.
If a boat has been repaired with epoxy and you grind it all out can you use vinylester resins?
Samari on s&f
Chet Olson

75 viper 2.4 200, 130 shot of NOS
91 vegas loaned out
79 vking project 2.5 280
User avatar

VultureNo2
Hydrostream know it all
Posts: 997
Joined: Nov 20, 2009 11:35 pm
Location: Pleasant Prairie, WI
Been thanked: 2 times

Re: 1977 Vulture Rebuild

Post: # 4116Post VultureNo2 »

Looks like a crap load of bondo to me. I'm excited you are getting so far. Check my post for some motivation. I glassed in the balsa next to the stringers tonight. I'll post some pictures over there. Bill
Locked

  • Random Topics
    Replies
    Views
    Last post